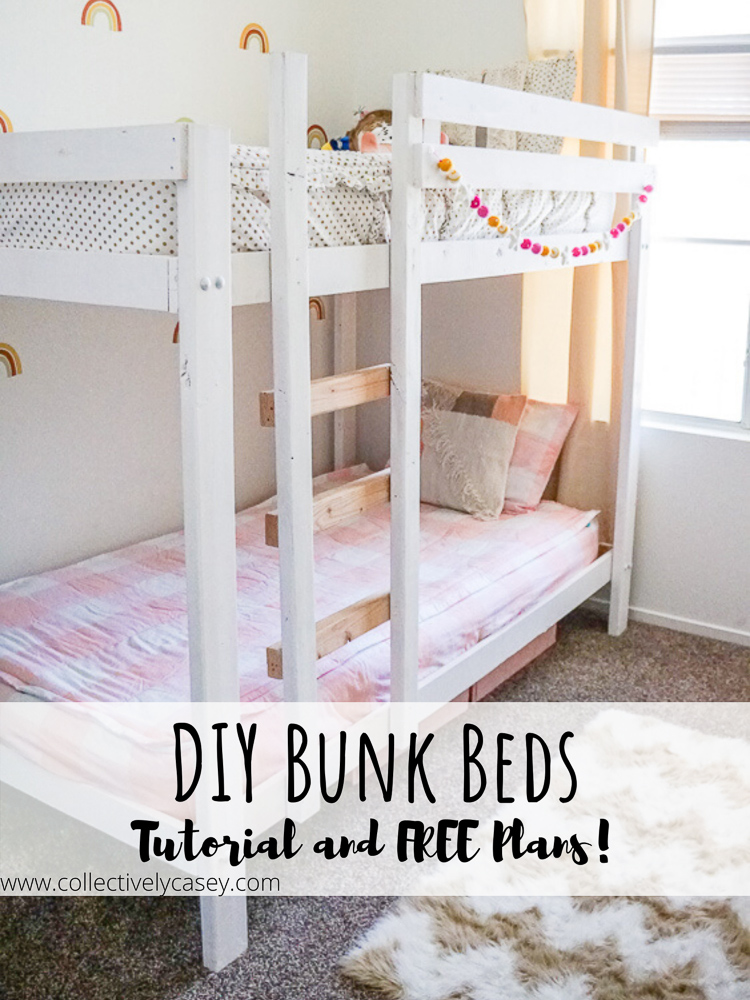
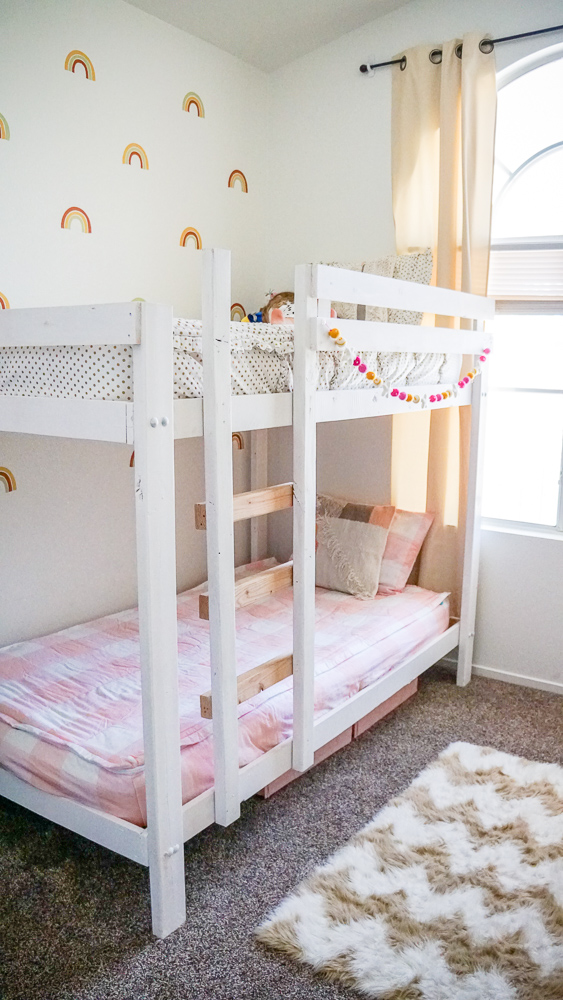
Hi everyone! What a crazy couple of weeks this has been! After my DIY patio furniture post went viral I couldn’t wait to start my next project (does anyone else get a high from completing projects?!) I knew I wanted to build bunkbeds for my girls, but I was super intimidated by the idea. After probably too much thinking, too many phone calls to my dad for reassurance, and tons of Pinterest searches I decided to go for it! But with one twist…I would be making up my own plans. As a novice woodworker/furniture builder this is kind of crazy, but it totally worked out and I am so excited to share with you my DIY bunk beds plans!
The Plan
One of the reasons I decided to make my own DIY bunk beds plans is that most of the others I found used really large and really heavy pieces of wood. My girls are small (ages 5 and 3) so I didn’t feel the need to build a huge piece of furniture for them.
*If you are planning to sleep teenagers or adults in these beds, I would suggest going with thicker lumber for the posts and slats.
I actually started out with a completely different plan in mind, and while it was super cute in theory it just didn’t pan out in person! And honestly I’m happy with the simplicity and style of these DIY bunk beds.
Supplies
–3/8 in.-16 x 3 in. Zinc Plated Carriage Bolt
-3/8 in. Zinc-Plated Flat Washer
-3/8 in.-16 Zinc Plated Hex Nut
-2 inch wood screws
-1 1/2 inch wood screws
-power drill
-circular saw or miter saw
-power sander
-80 grit sandpaper
-variety of drill bits
-paint or stain of choice
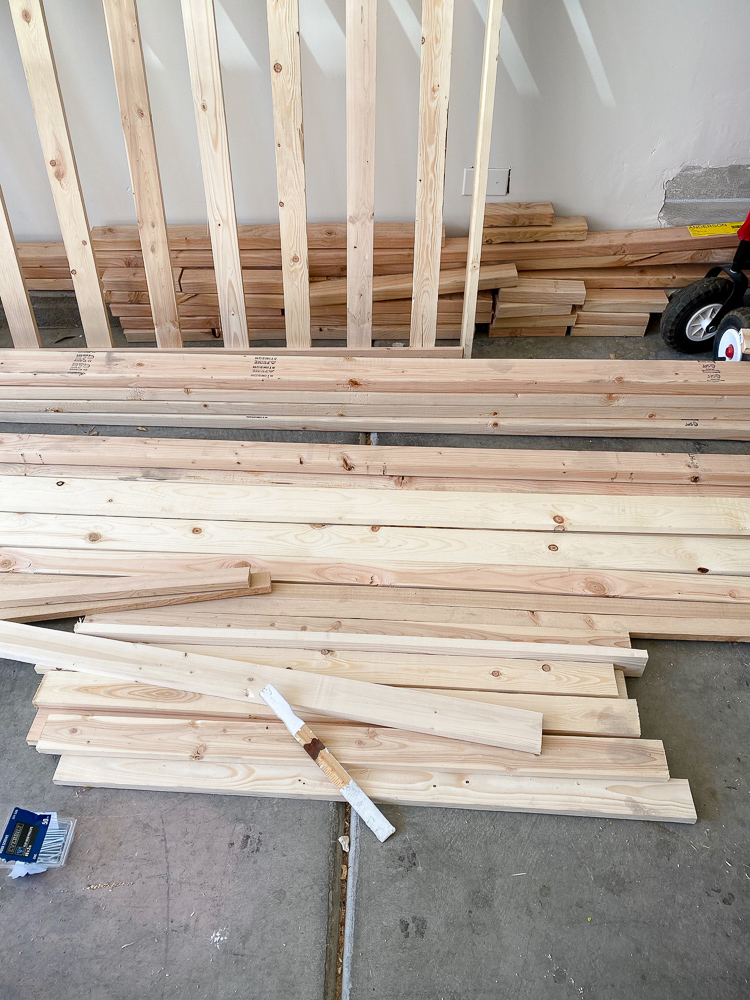
Lumber
-9, 1x4x8 boards
-2, 1x2x8 boards
-11, 1x3x8 boards
-4, 2x4x8 boards
-3, 2x3x8
Lumber Cut List
For bed frames
-4, 1×4 cut at 77 inches
-4, 1×4 cut at 41.5 inches
-22, 1×3 cut at 40 inches
-4, 1×2 cut at 75 inches
-4, 2×4 cut at 59 inches
-2, 1×4 cut at 52 1/2 inches
-2, 1×4 cut at 43 3/4 inches
Ladder
-3, 2×3 cut at 16 inches
-2, 2×3 cut at 56 1/2 inches
Instructions
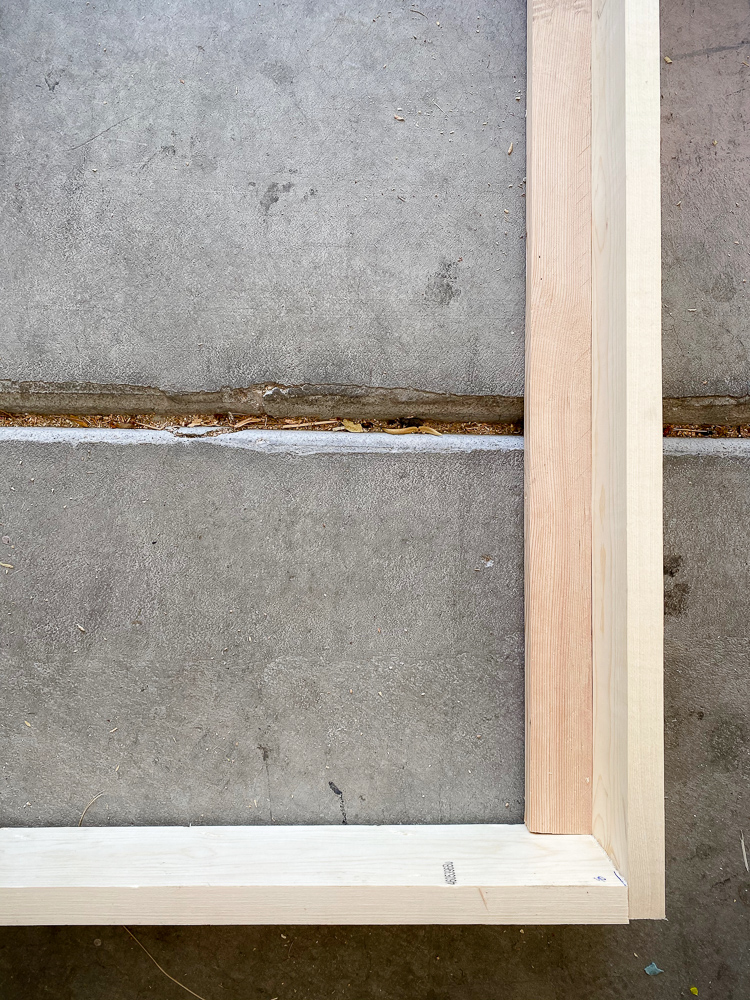
1.Start by laying out the basic structure of your bed frame. Take 2 of the 77 inch 1x4s and square them up to 2 of the 41.5 inch 1x4s. Drill pilot holes and attach each board with two 2 inch screws.
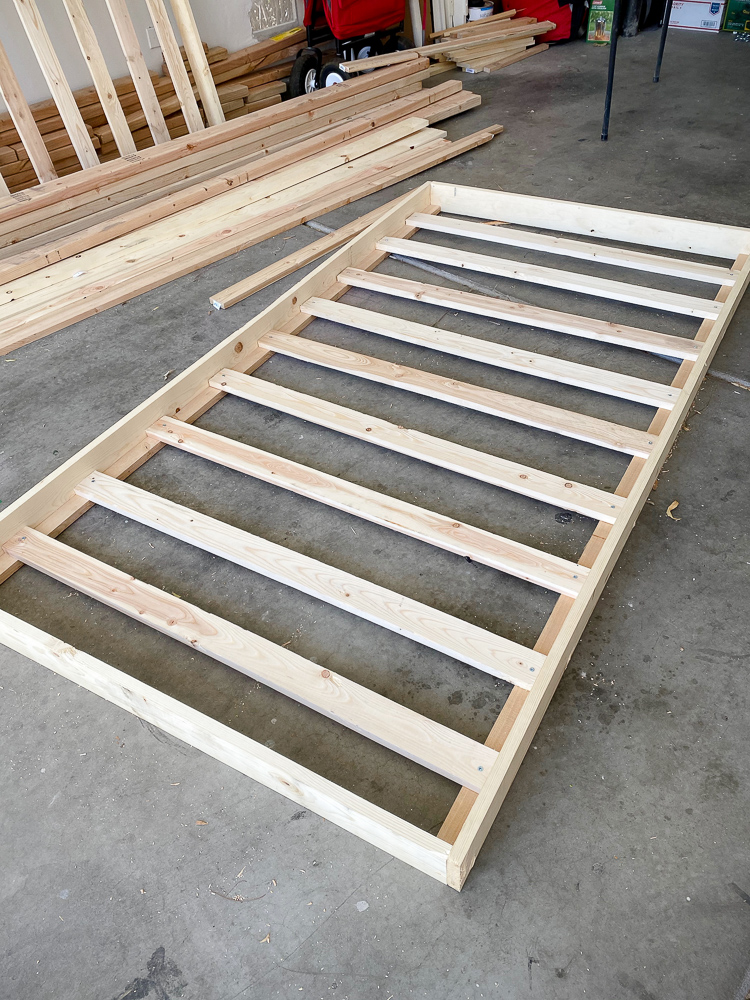
2. Line one 1×2 board along each long side of the bed frame and screw in with 1 1/2 inch wood screws.
3. Lay out 11 of the 1×3 40 inch boards horizontally to create the bed slats. You can measure these out but I just eyeballed it! Drill pilot holes and screw in each slat to the 1×2 boards with 1 1/2 inch screws.
4. Repeat steps 1-3 to create a the second bed frame!
5. Measure 8 inches down from the top of each 2×4 and mark with a pencil. Use a 3/8 inch drill bit to drill a hole where the bolts will insert. Line up the 2×4 on each corner of the bed frames and make sure they are level/squared then make a mark with a pencil. Use the same drill bit to drill a corresponding hole into the bed frames.
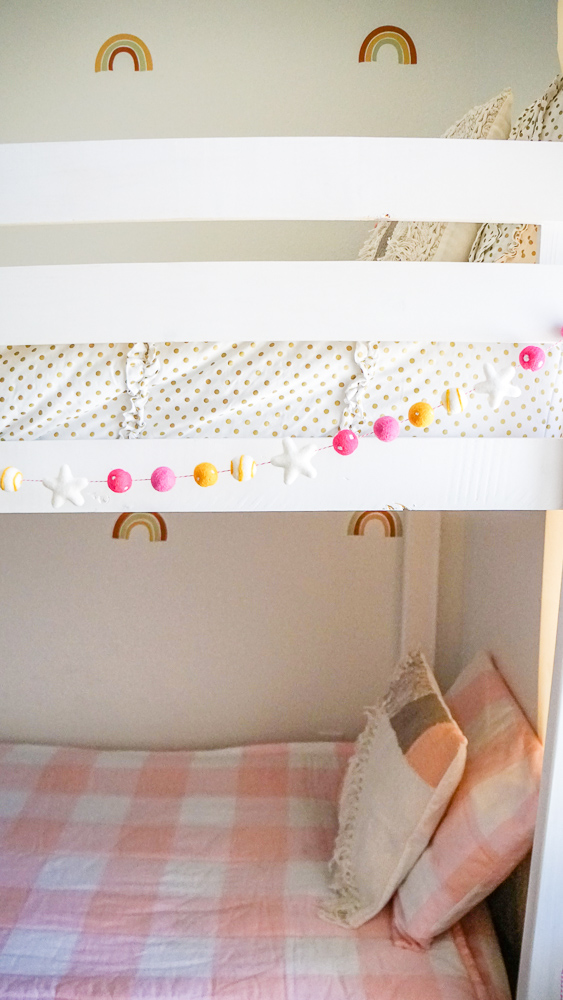
6. Take the 16 inch 2x3s and space them out evenly between the 56 1/2 inch 2x3s to create the ladder. After much trial and error I opted to attach the rungs from the back rather than the side and love the end result.
Assembly
I did this part on my own, but definitely recommend having a second person to make the process smoother!
1.Take the posts and bed frames to the room where they will be used. Tip the first bed frame onto its side and attach the first post with 2 carriage bolts, 2 washers, and 2 hex nuts. Repeat for the remaining four corners.
2. Stand the bunk beds upright and position the second bed frame. I purposely attached the bottom bunk 8 inches off the ground for under bed storage. Make sure each corner of the frame is square and level with the posts, then drill the 3/8 inch pilot holes.
3. Attach the bottom bunk to the posts with 2 carriage bolts, 2 washers and 2 hex nuts per post.
4. Position the ladder at the bottom edge of the bottom bunk. Drill pilot holes through the ladder and the bed frame and attach with wood screws. Add additional wood screws where the ladder attaches to the top bunk for stability.
5. Take the two 52 1/2 inch 1x4s and screw them into the top bunk bed frame to create a side rail. Add wood screws where they attach to the corner post and the ladder for extra stability. Additionally, add a 43 3/4 inch 1×4 to the head and foot of the bed.
I wouldn’t say this was a difficult DIY, the assembly was definitely the trickiest part! I made quite a few errors (I hate measuring) but was able to figure it out as I went. Hopefully this tutorial saves you from making the same mistakes that I did!
Total investment for this project was $116, way cheaper than buying from the store! I have plans to add some fun custom features to this bed as well, once I recover from this massive project. Stay tuned for that, and let me know if you plan to tackle this project!