Huge thanks to Daltile and The Home Depot for sponsoring this project. All expressed opinions are my own.
I think you all know how much I love a good before and after, and this definitely ranks as one of my favorites of all time! A couple weeks ago, I flew down to my parents house to renovate one of the few original rooms in their 1970’s house – the master bathroom. I learned so many new skills during this renovation, and I am so excited to share the entire process of this renovation with you guys!
The Home Depot recently started carrying QuicTile by Daltile, and I was given the opportunity to install it in a room and share the process on my platforms. I am so grateful for this opportunity not only because I was able to learn a new skill, but because I was able to really transform a space in my parents house AND share the awesome details of everything with you!
The Before
Before I dive into the installation process and review of QuicTile, let’s take a look at what this master bathroom used to look like.
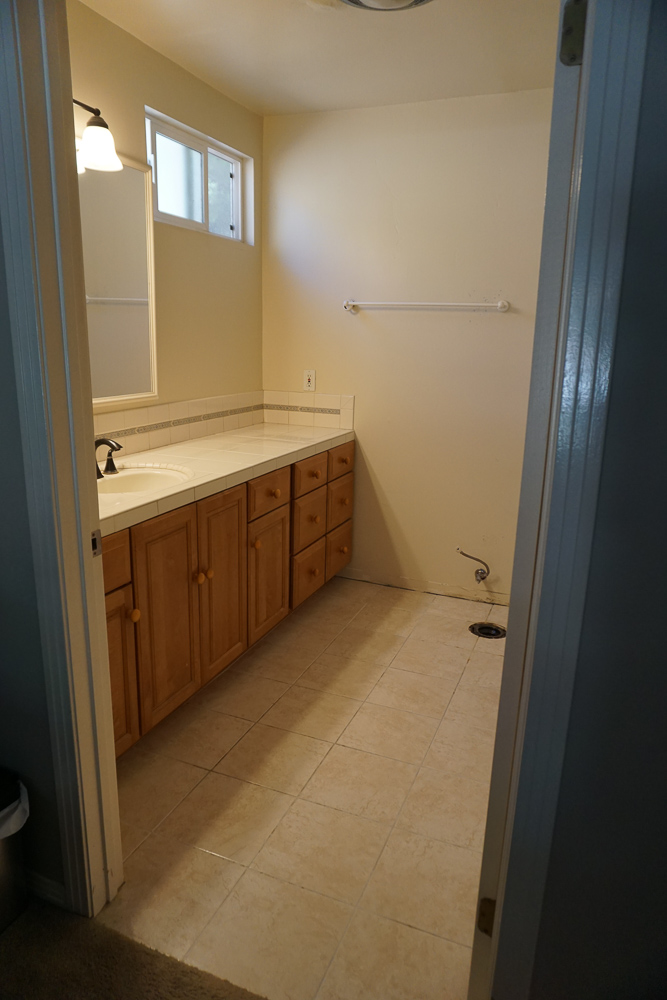
The honey oak vanity is in great shape, but it looks dated and boring alongside the drab tile flooring and 1970’s countertops. I decided to start with flooring to really bring this space back to life!
QuicTile by Daltile
Let me start by saying that if we had to demo any of the existing flooring, this project would not have happened! Tile demo is messy, difficult, and time consuming and not something I wanted to get into. The reason that QuicTile really caught my attention, is that it is a floating floor system – you install it over existing hard surface flooring and don’t have to use mortar! If the floors in our house hadn’t just been redone less than a year ago, I would have installed this product in our own home in a heartbeat.
QuicTile also uses a unique tongue and groove click connect system. It is a simple and easy process that beginners can accomplish fairly quickly. Working in short time increments between giving my kids snacks and keeping them entertained, we finished this bathroom over the course of three days. With a babysitter, I have no doubts it could be accomplished in one day.
Supplies
–QuicTile by Daltile underlayment
–QuicTile by Daltile flooring
–QuicTile by Daltile grout
–wet saw and/or tile cutter
-rubber mallet
-floor tapping block
-pull bar
-wedge spacers
-grout trowel
-grout float

Installation
The first step in installing QuicTile is to clean the existing floors of any debris, and lay out the QuicPrep underlayment. The underlayment is a thin sheet that is easily cut to fit around door frames, cabinetry, and plumbing.
Once the underlayment is down, you can begin installing the individual tiles! We started in the back right corner, making sure to use tile spacers around the perimeter of the room. The Home Depot published a very helpful installation video on YouTube that we referenced frequently, I will link to it HERE.

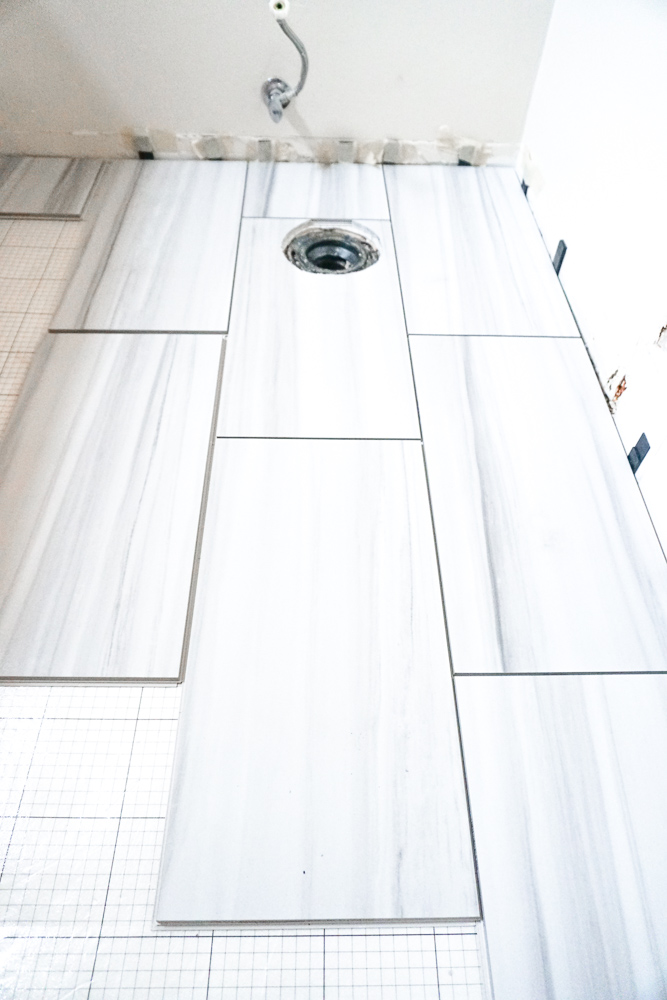
As you can see above, we worked in a diagonal pattern partially installing the first 3 rows before finishing the first row. This helps keep everything even and aligned during the install. Daltile recommends avoiding a grid pattern, so we cut the first tile of each alternating row to the convenient 33% mark indicated on the tiles.
QuicTile can be cut with a tile cutter, however ours was old and not working so we made all cuts with a wet saw. You can rent both of these tools from Home Depot if you don’t own them! The wet saw is required if you need to make any detail cuts, such as around a toilet or door frame.
Each tile clicks into place using a tongue and groove system, but you will also need to utilize a mallet and block to really secure the tiles in place. This was fairly simple, I was able to complete these steps while pregnant so it is definitely a beginner level task!

After laying all the tiles, I removed the wedge spacers and started on the grout. I love that this grout comes pre mixed so I know I’m getting the right consistency. Using a grout trowel and grout float, add small amounts (about the size of a baseball) of grout to the flooring. Firmly press the grout into the crevices and wipe away at a 45 degree angle. This was by far the most satisfying part of a project I’ve ever done! Grouting this entire space took me about 20 minutes!
Lastly, allow the flooring 24 hours before stepping on it, and a full 72 hours to cure.
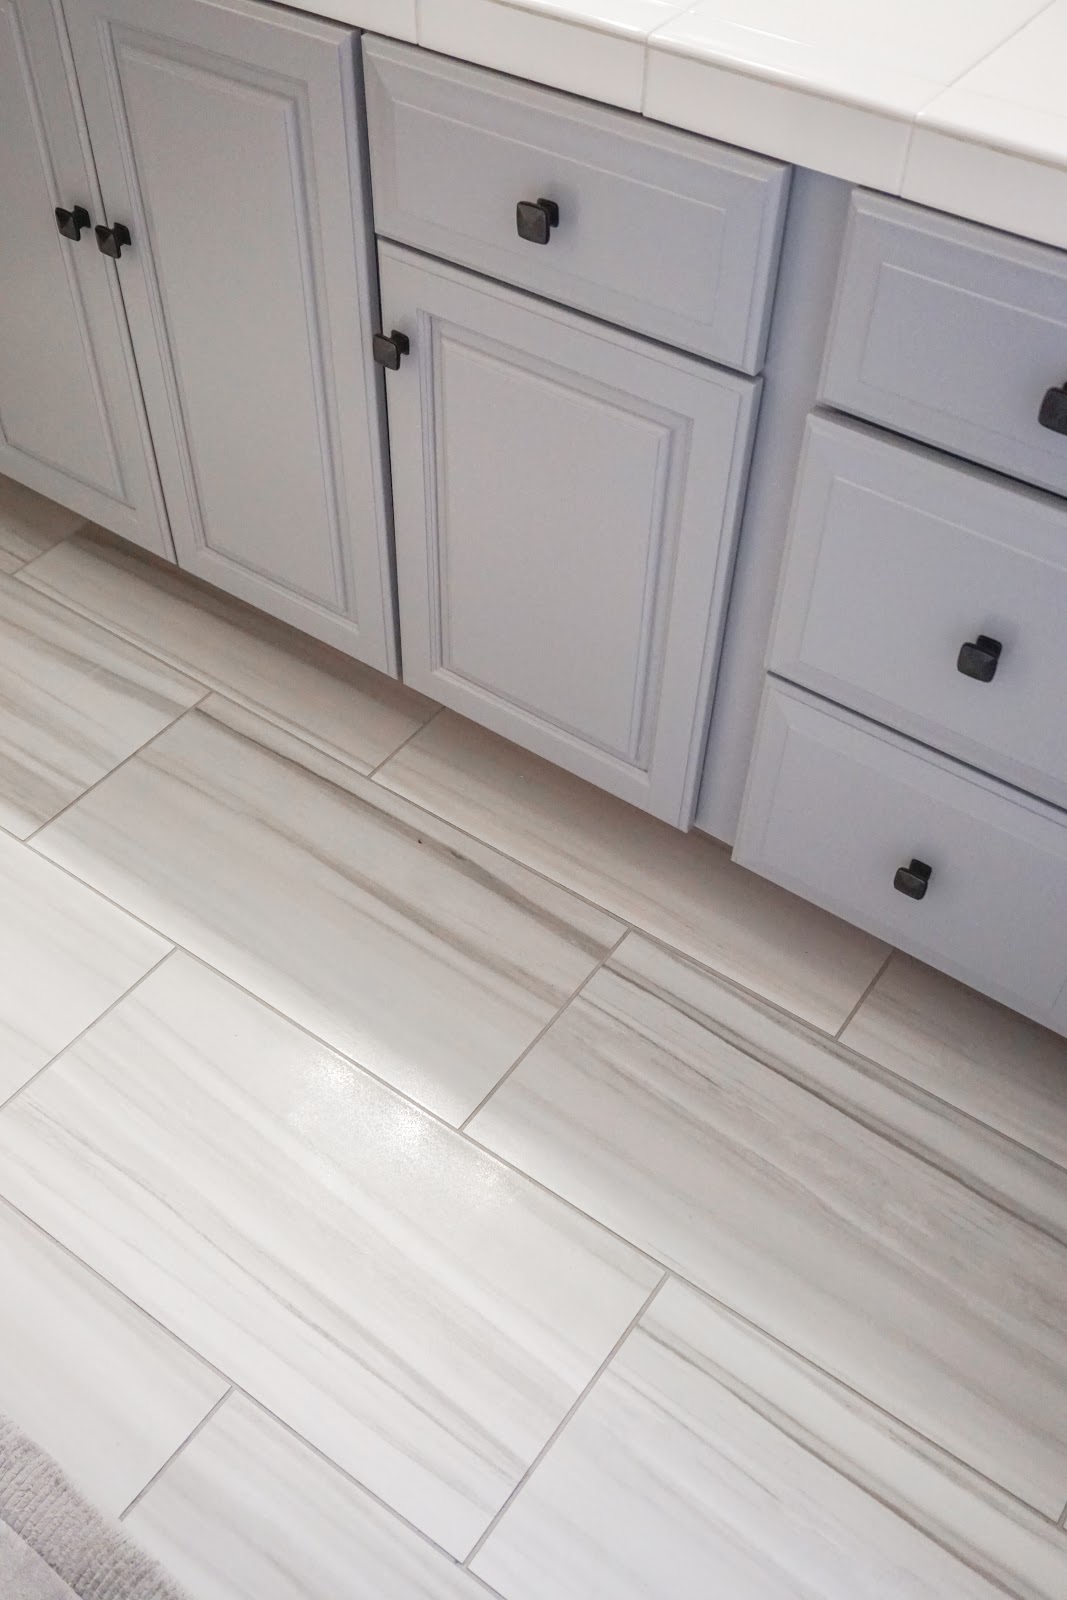
I could not believe the immediate transformation QuicTile had on this small bathroom! It looked larger, very high end, and like a professional installed it.
After installing the flooring, the honey oak vanity really clashed with the beautiful gray so I opted to repaint the cabinets. I used BIN Zinsser water based primer, Behr Elemental Gray paint, and polyurethane all from The Home Depot.

The last step of this bathroom renovation was adding a bead board wall treatment and new baseboards! The pattern on the tile really draws your eyes back, and the bead board draws your eyes upward making this small bathroom feel much bigger than it really is!
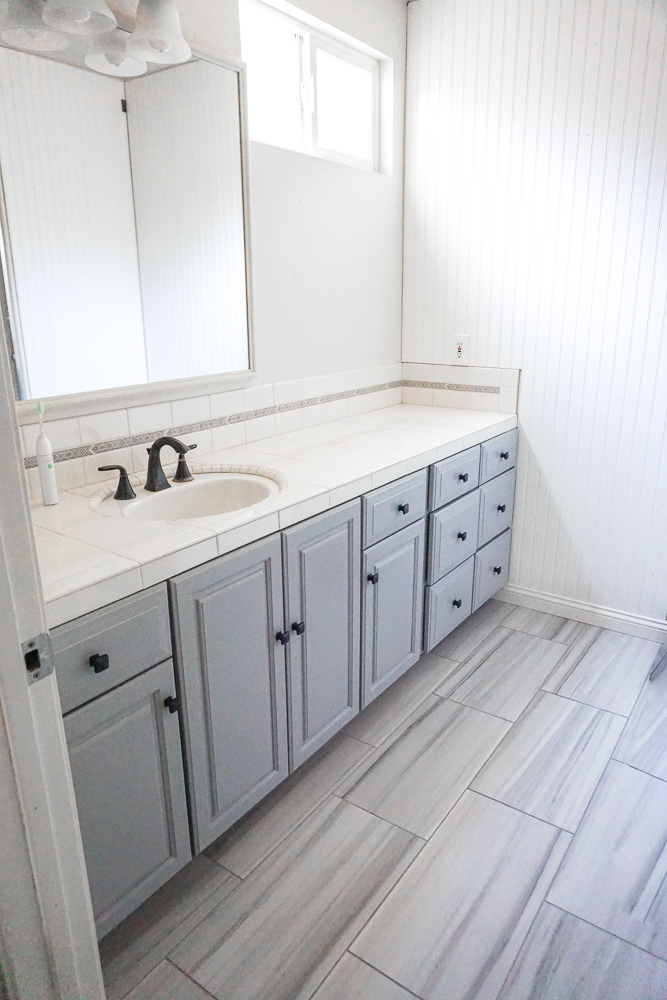
This project turned out better than I could have imagined, and my parents are thrilled with their new master bathroom!
What do you think? Would you consider taking on a project like this? Find QuicTile by Daltile at your local Home Depot or by shopping this link!
See more of my before and after DIY projects HERE!
Can you tell me what you used for transition between carpet and floors?
I love this tile! It’s so beautiful and you did a fantastic job!
I just ordered these tiles from HD. I am super excited about trying them in our master bath. Did you have any issues with the bottom part of the tiles (the click together part) being fragile and easily breaking/crumbling? I feel like if I push them to hard together they will break easily. I haven’t even tried cutting any yet due to this concern. did you have this happen to you at all?
Author
Hi! We had a couple of minor breaks, but not enough to render the tiles unusable! It is much stronger than it appears. Hope your reno goes smoothly!