This post was sponsored by The Home Depot. All expressed opinions are my own.
Our house is tiny, I talk about this all the time and try to share solutions for making the most out of a tiny house when I can! One thing that is odd about our house is that we have a zero lot line on one side (no side yard) and a huge side yard on the other side. When I look at the large side yard I get a little grumpy that the builders didn’t just make our house bigger since it seems like a huge waste of space. Since expanding our rental house isn’t an option, I started brainstorming ways we could make that area more functional. I am excited to team up with Home Depot to create this functional side yard patio and cozy fire pit area, turning our excess space into an area our whole family enjoys!
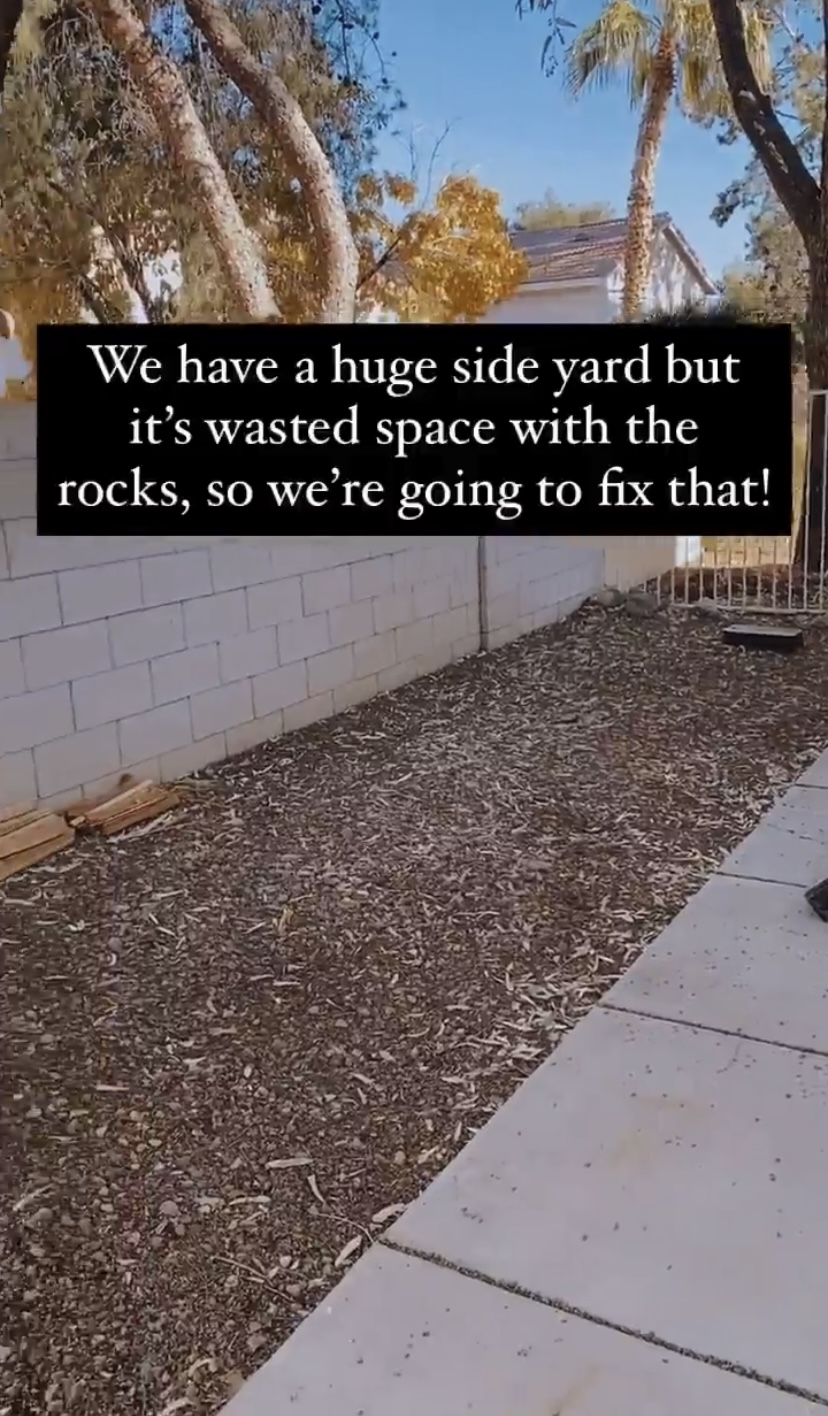
Before + The Plan
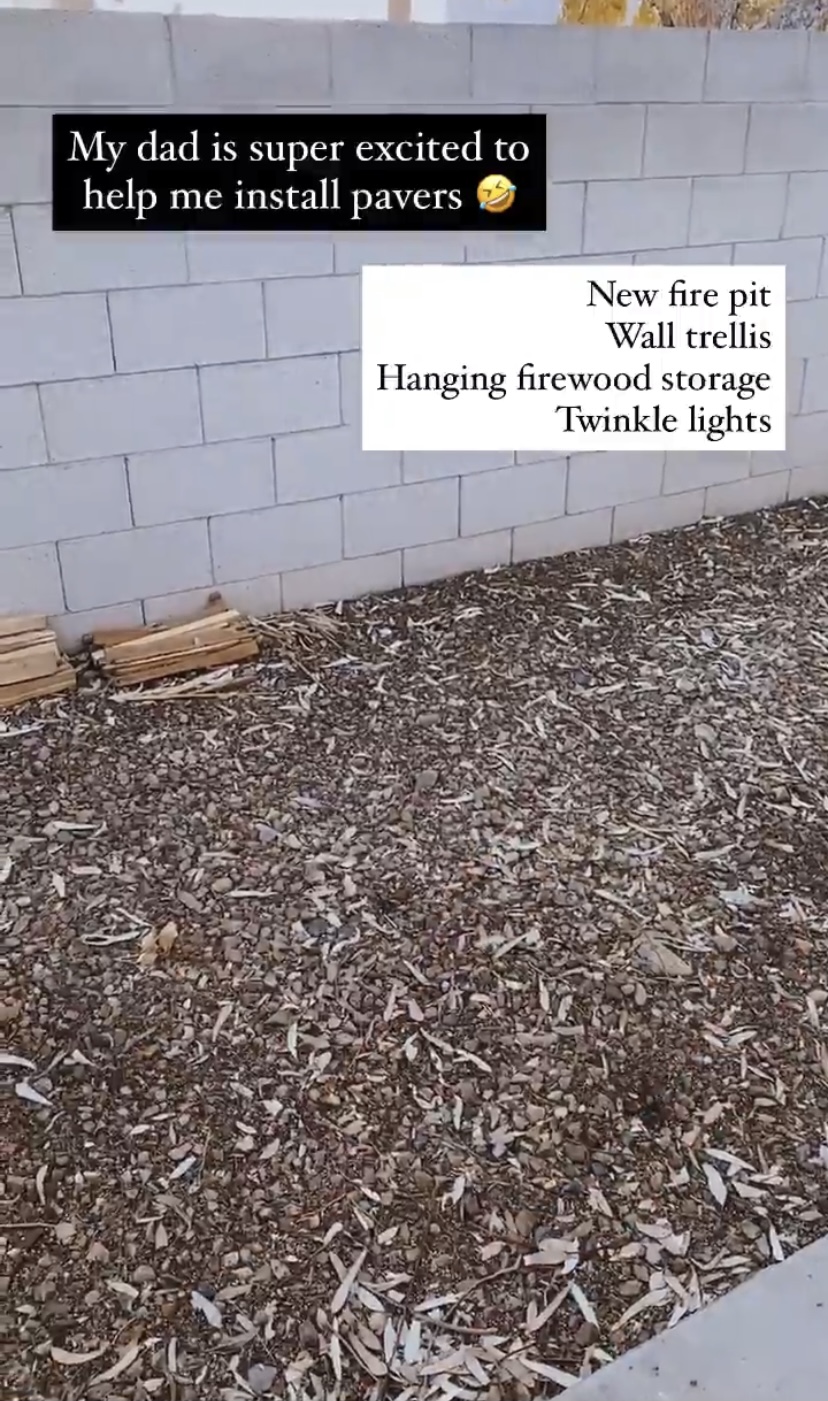
This area before the project consisted of a cinderblock wall, a large (six feet deep) area with river rocks, and a sidewalk. The sidewalk was great for the kids to play with chalk and ride their bikes, but the space was not utilized well. I decided I wanted to find a way to install a patio that was renter friendly, but large enough to be a functional space and replace the rocks.
I did a ton of research into installing pavers, and decided that was not the direction I wanted to go. First off, pavers are fairy expensive and to make this renter friendly I wanted to stay on a tight budget. Second, installing pavers requires digging down into the area, leveling it, and using tools and techniques I was unfamiliar with to insure a tight seal and level surface. AKA way too much work for something that would eventually need to be removed.
I reached out to a friend who installed a budget patio in their backyard and she suggested looking into stepping stones. I really liked these stepping stones from Home Depot because they are very affordable and look nice laid down. After doing a bit more research, I decided that was the direction to take.
Installing the Patio
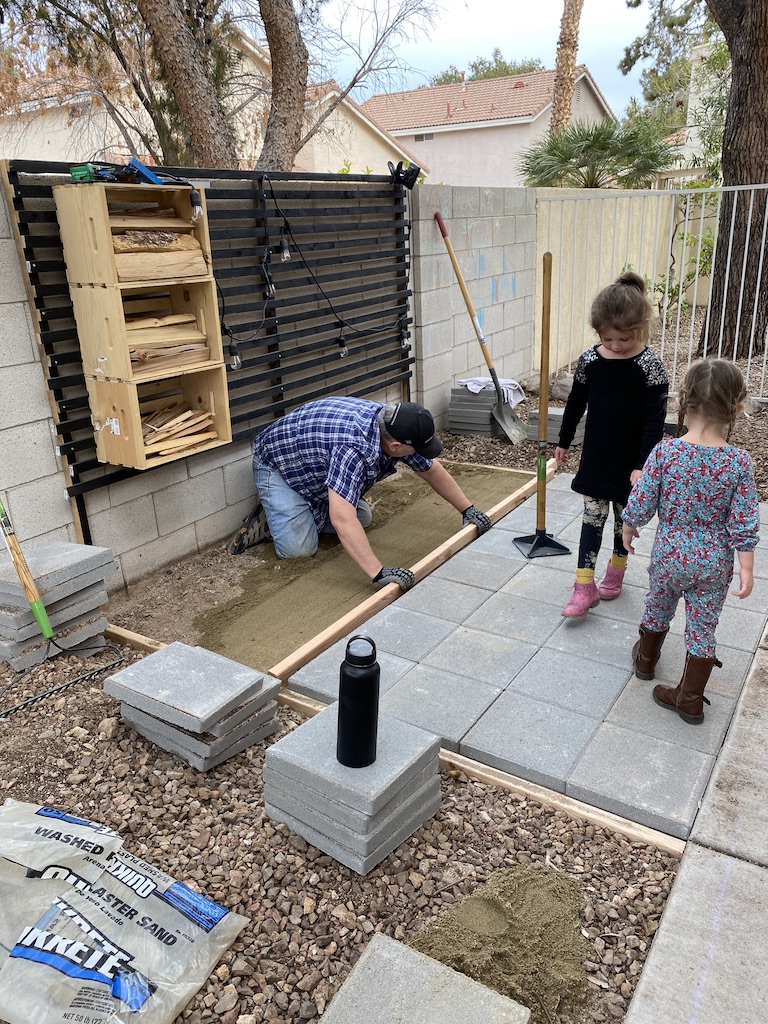
To be completely honest, I tend to be a lazy DIYer and have little issue cutting corners on projects to complete them faster. Unfortunately, installing a patio is not a project where one can cut corners and still get a desirable result. I asked my dad to come do this part of the project for me since I had a 4 day old baby, and luckily for me he’s much more thorough than I am and did a great job!
What you need:
–stepping stones
–sand
–tamper (if you don’t want to buy one, these are available to rent at some Home Depot locations)!
-2x4s
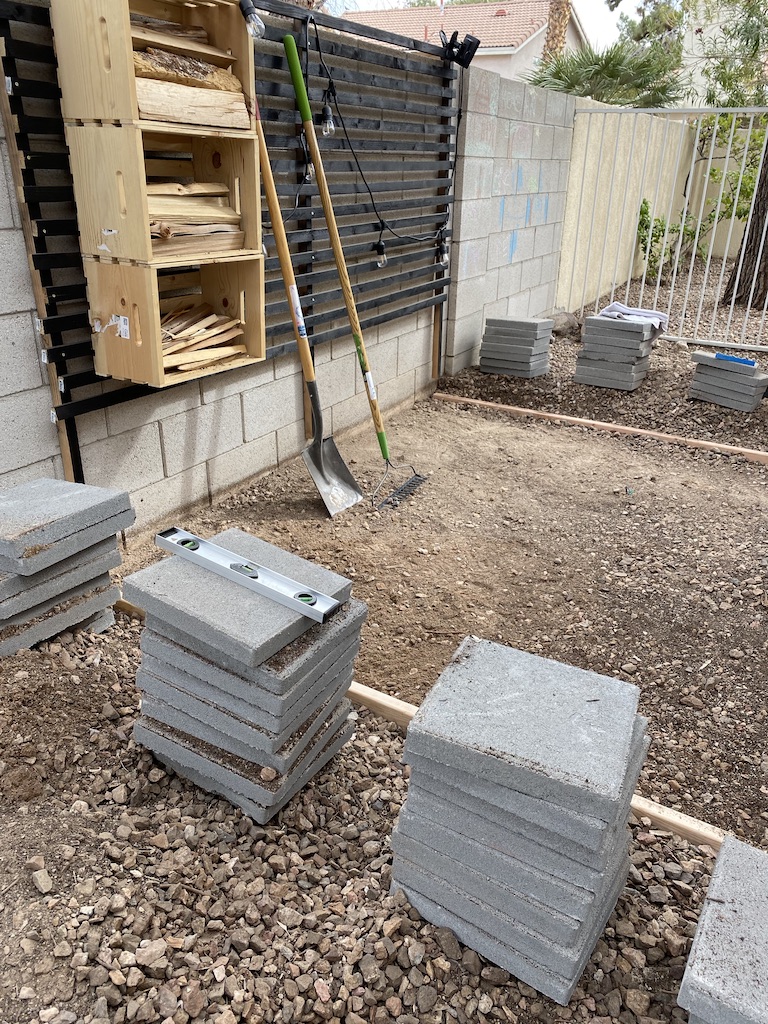
- The first thing he did was to shovel and rake the rocks out of the area where we wanted to lay the stepping stones.
- Next, he dug a trough on either edge of the area and laid a 2×4 to keep the area even.
- Using another 2×4, he poured bags of sand and smoothed the area out between the two 2x4s.
- Using a tamper (we rented from our local Home Depot) he tamped the sand until it was level and even.
- Then he laid stepping stones one by one, checking to make sure they were level after each install.
- Finally, he poured more sand over the top and used a broom to sweep it into all the cracks in between the stepping stones.
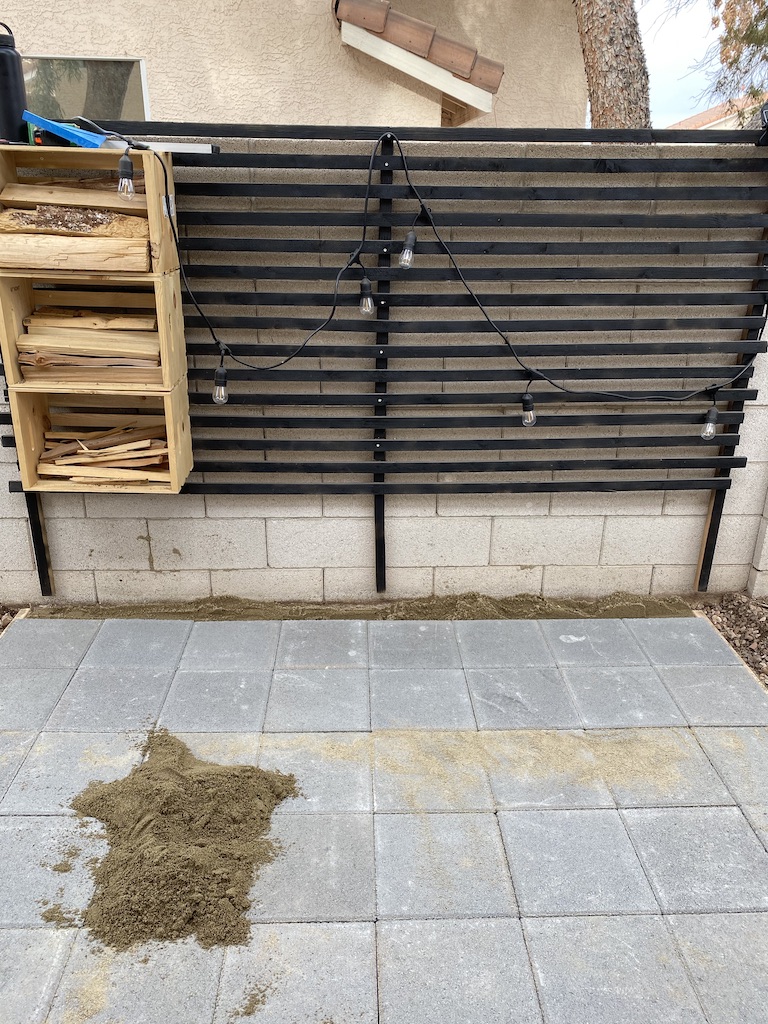
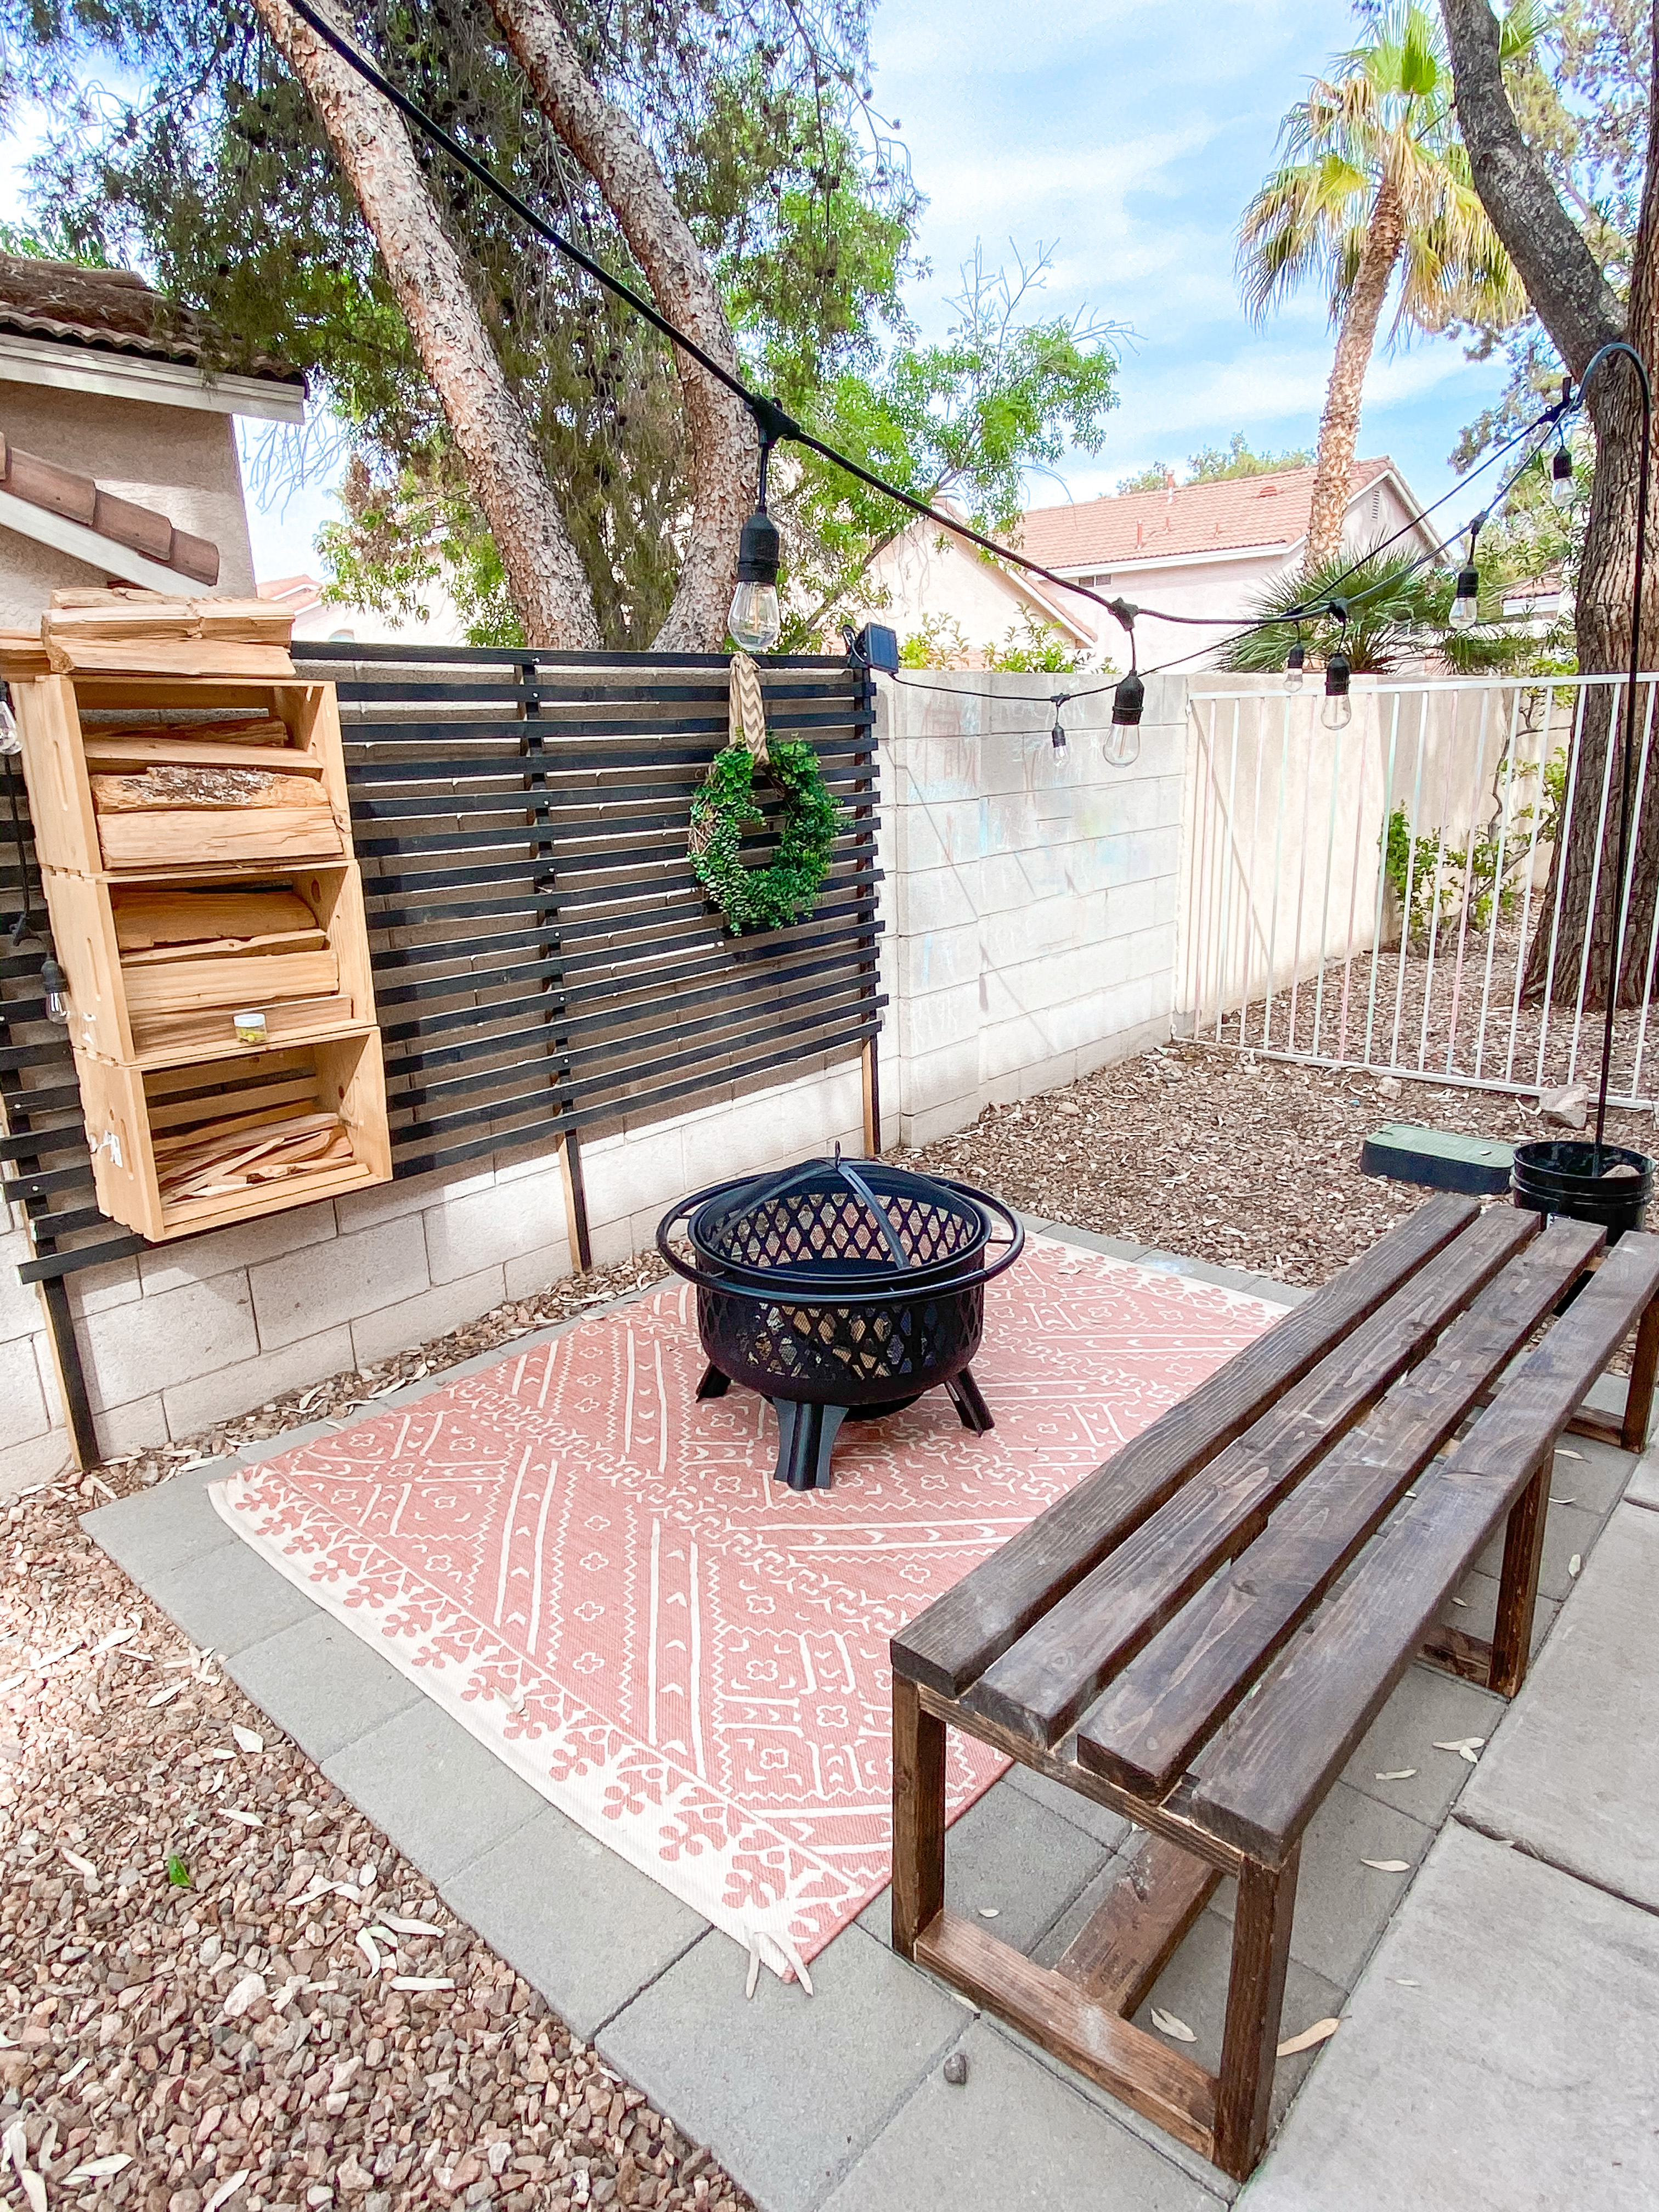
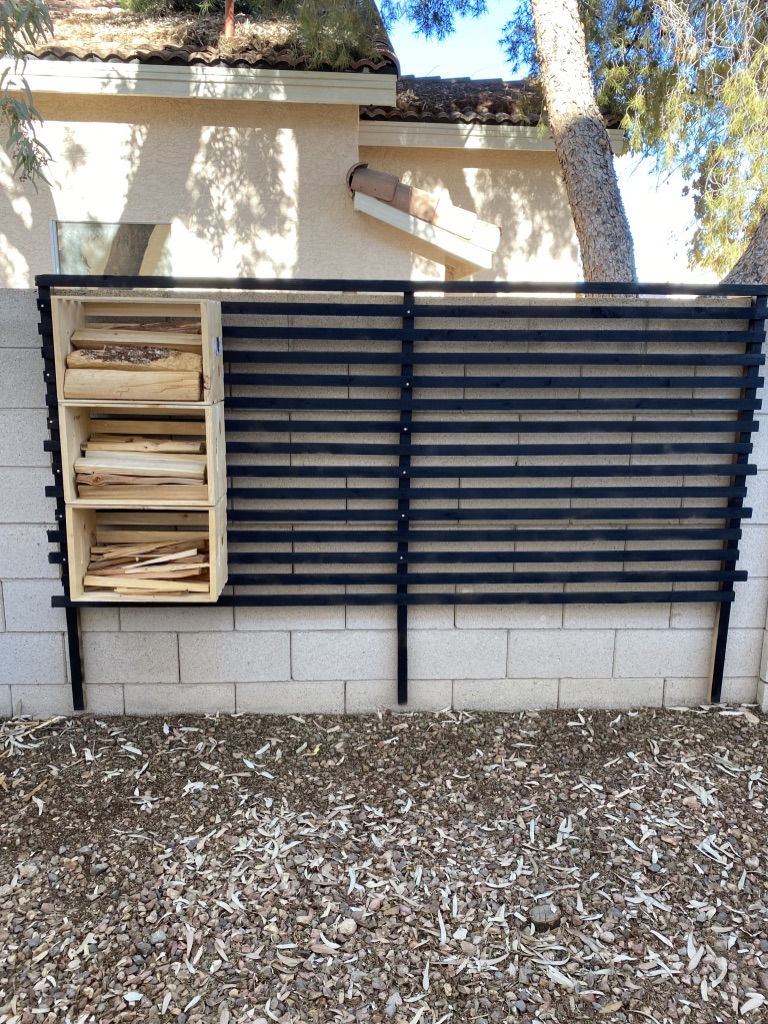
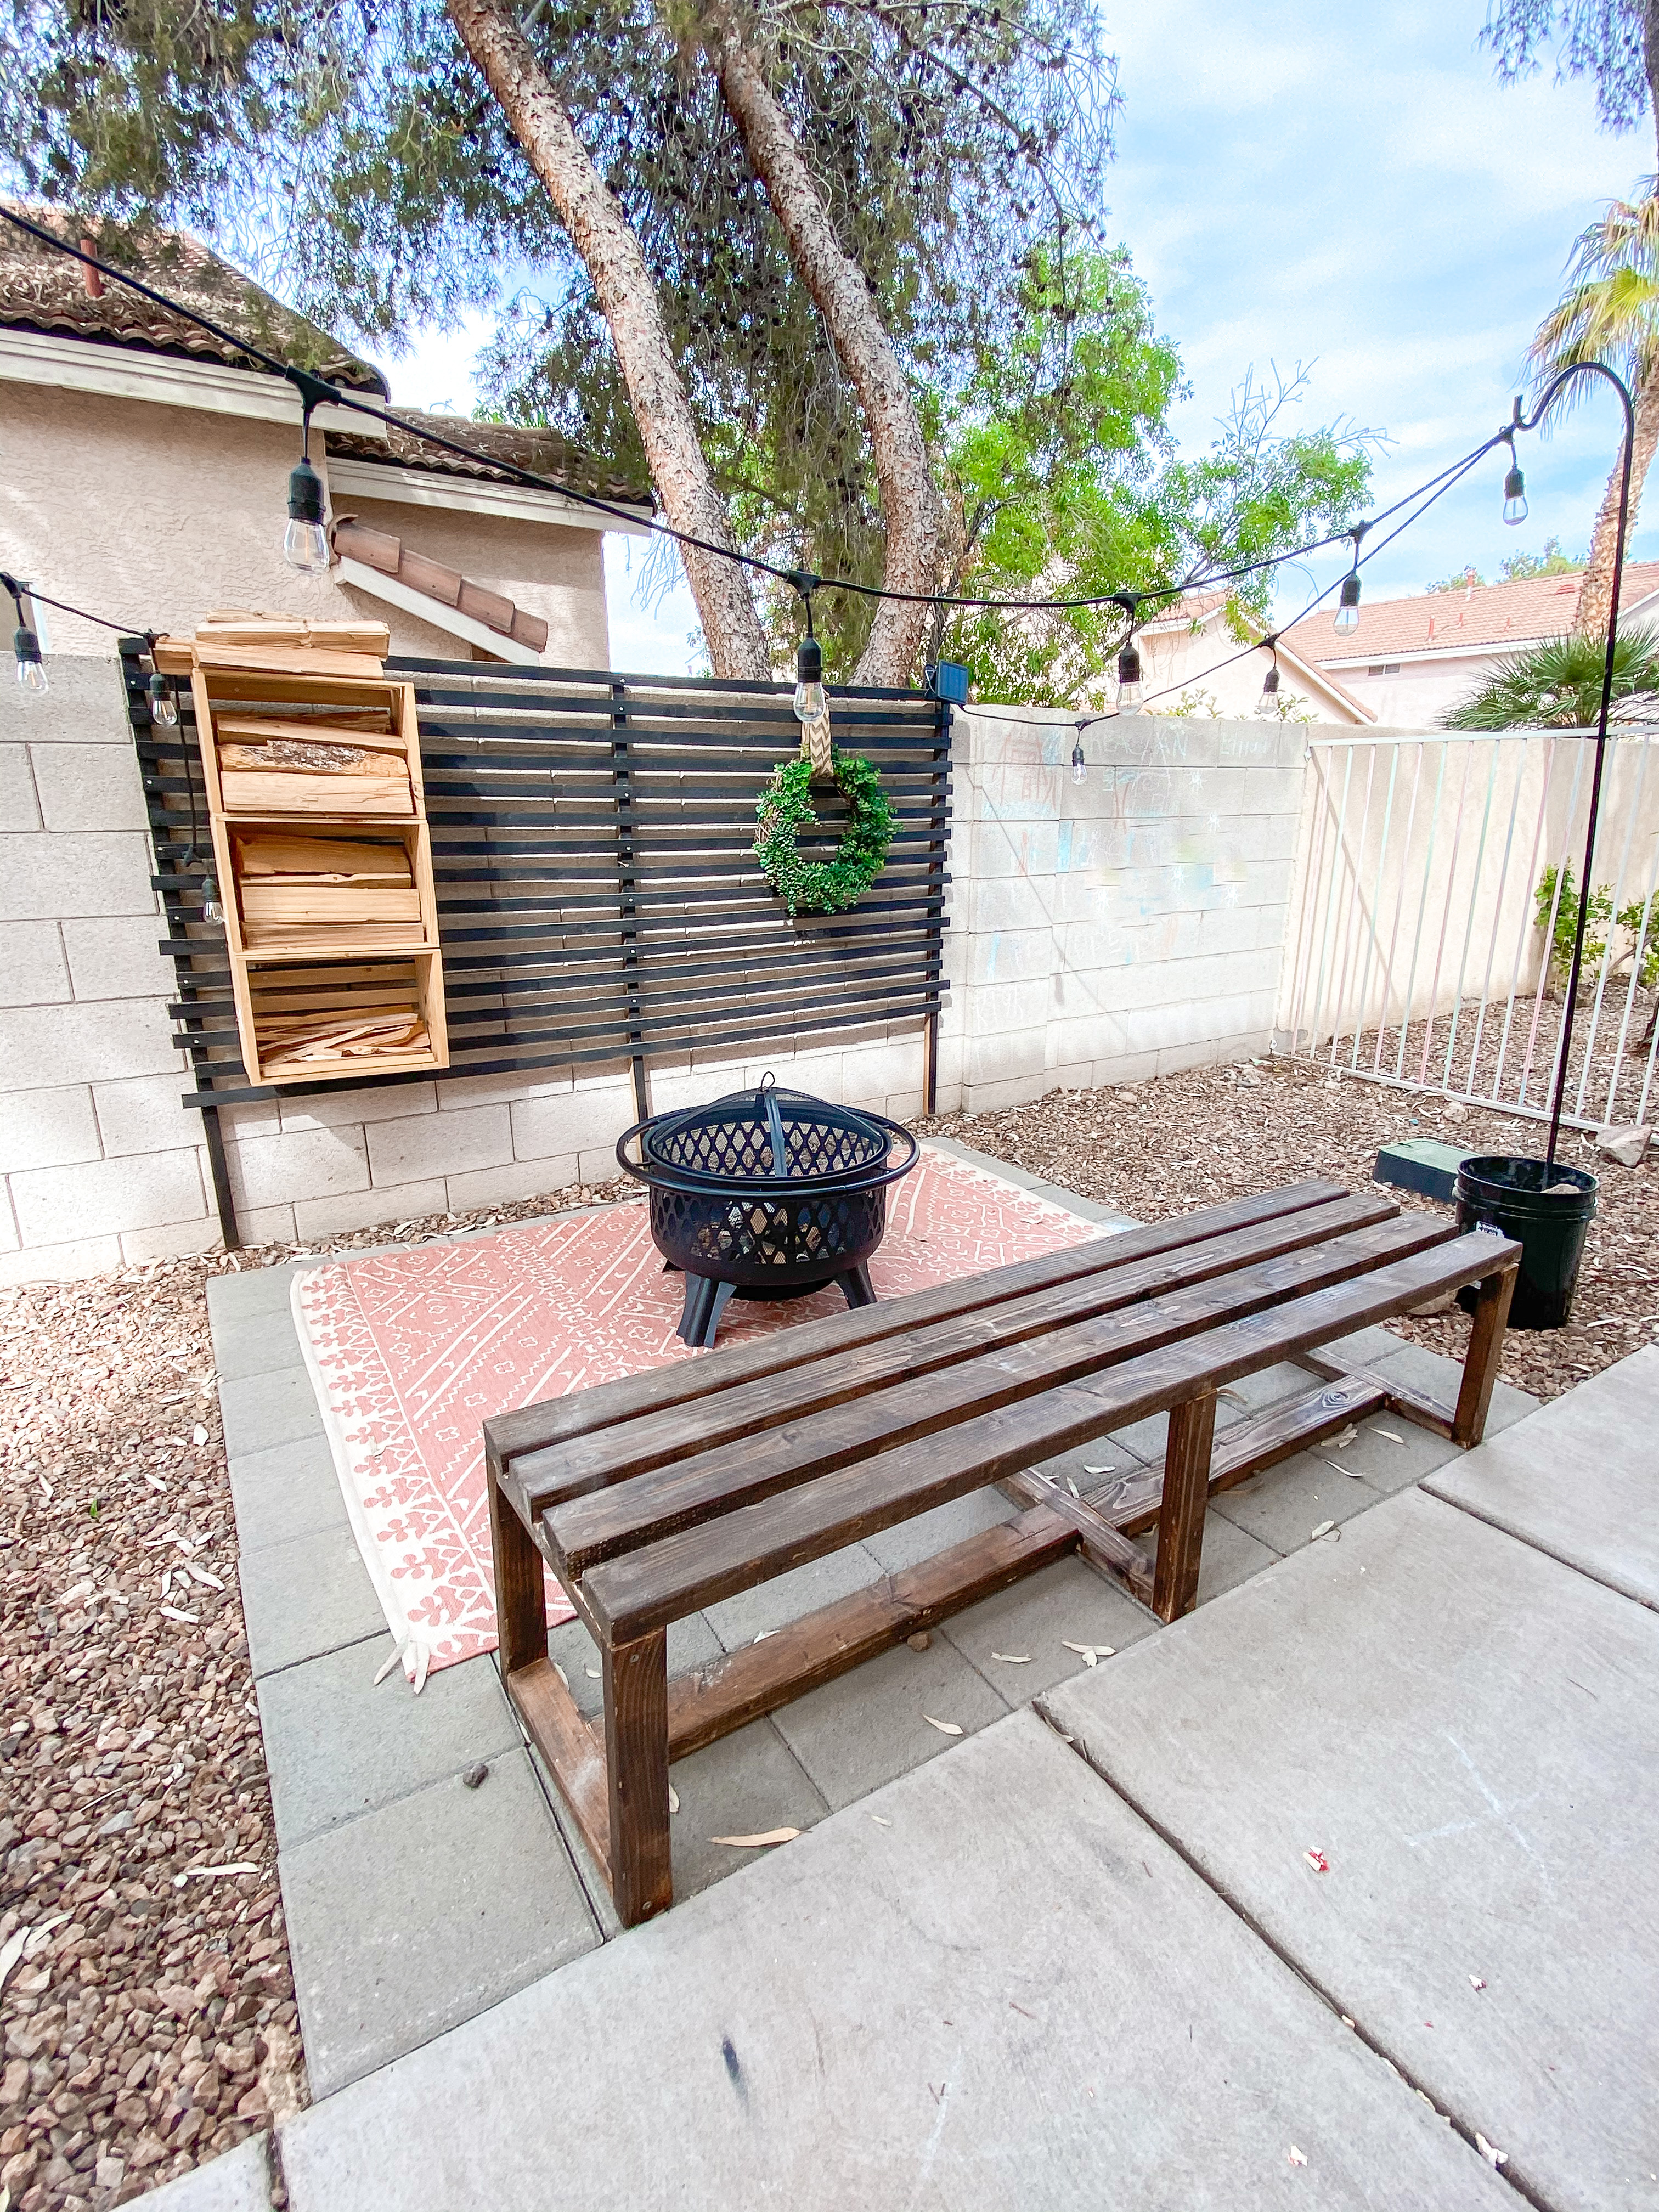
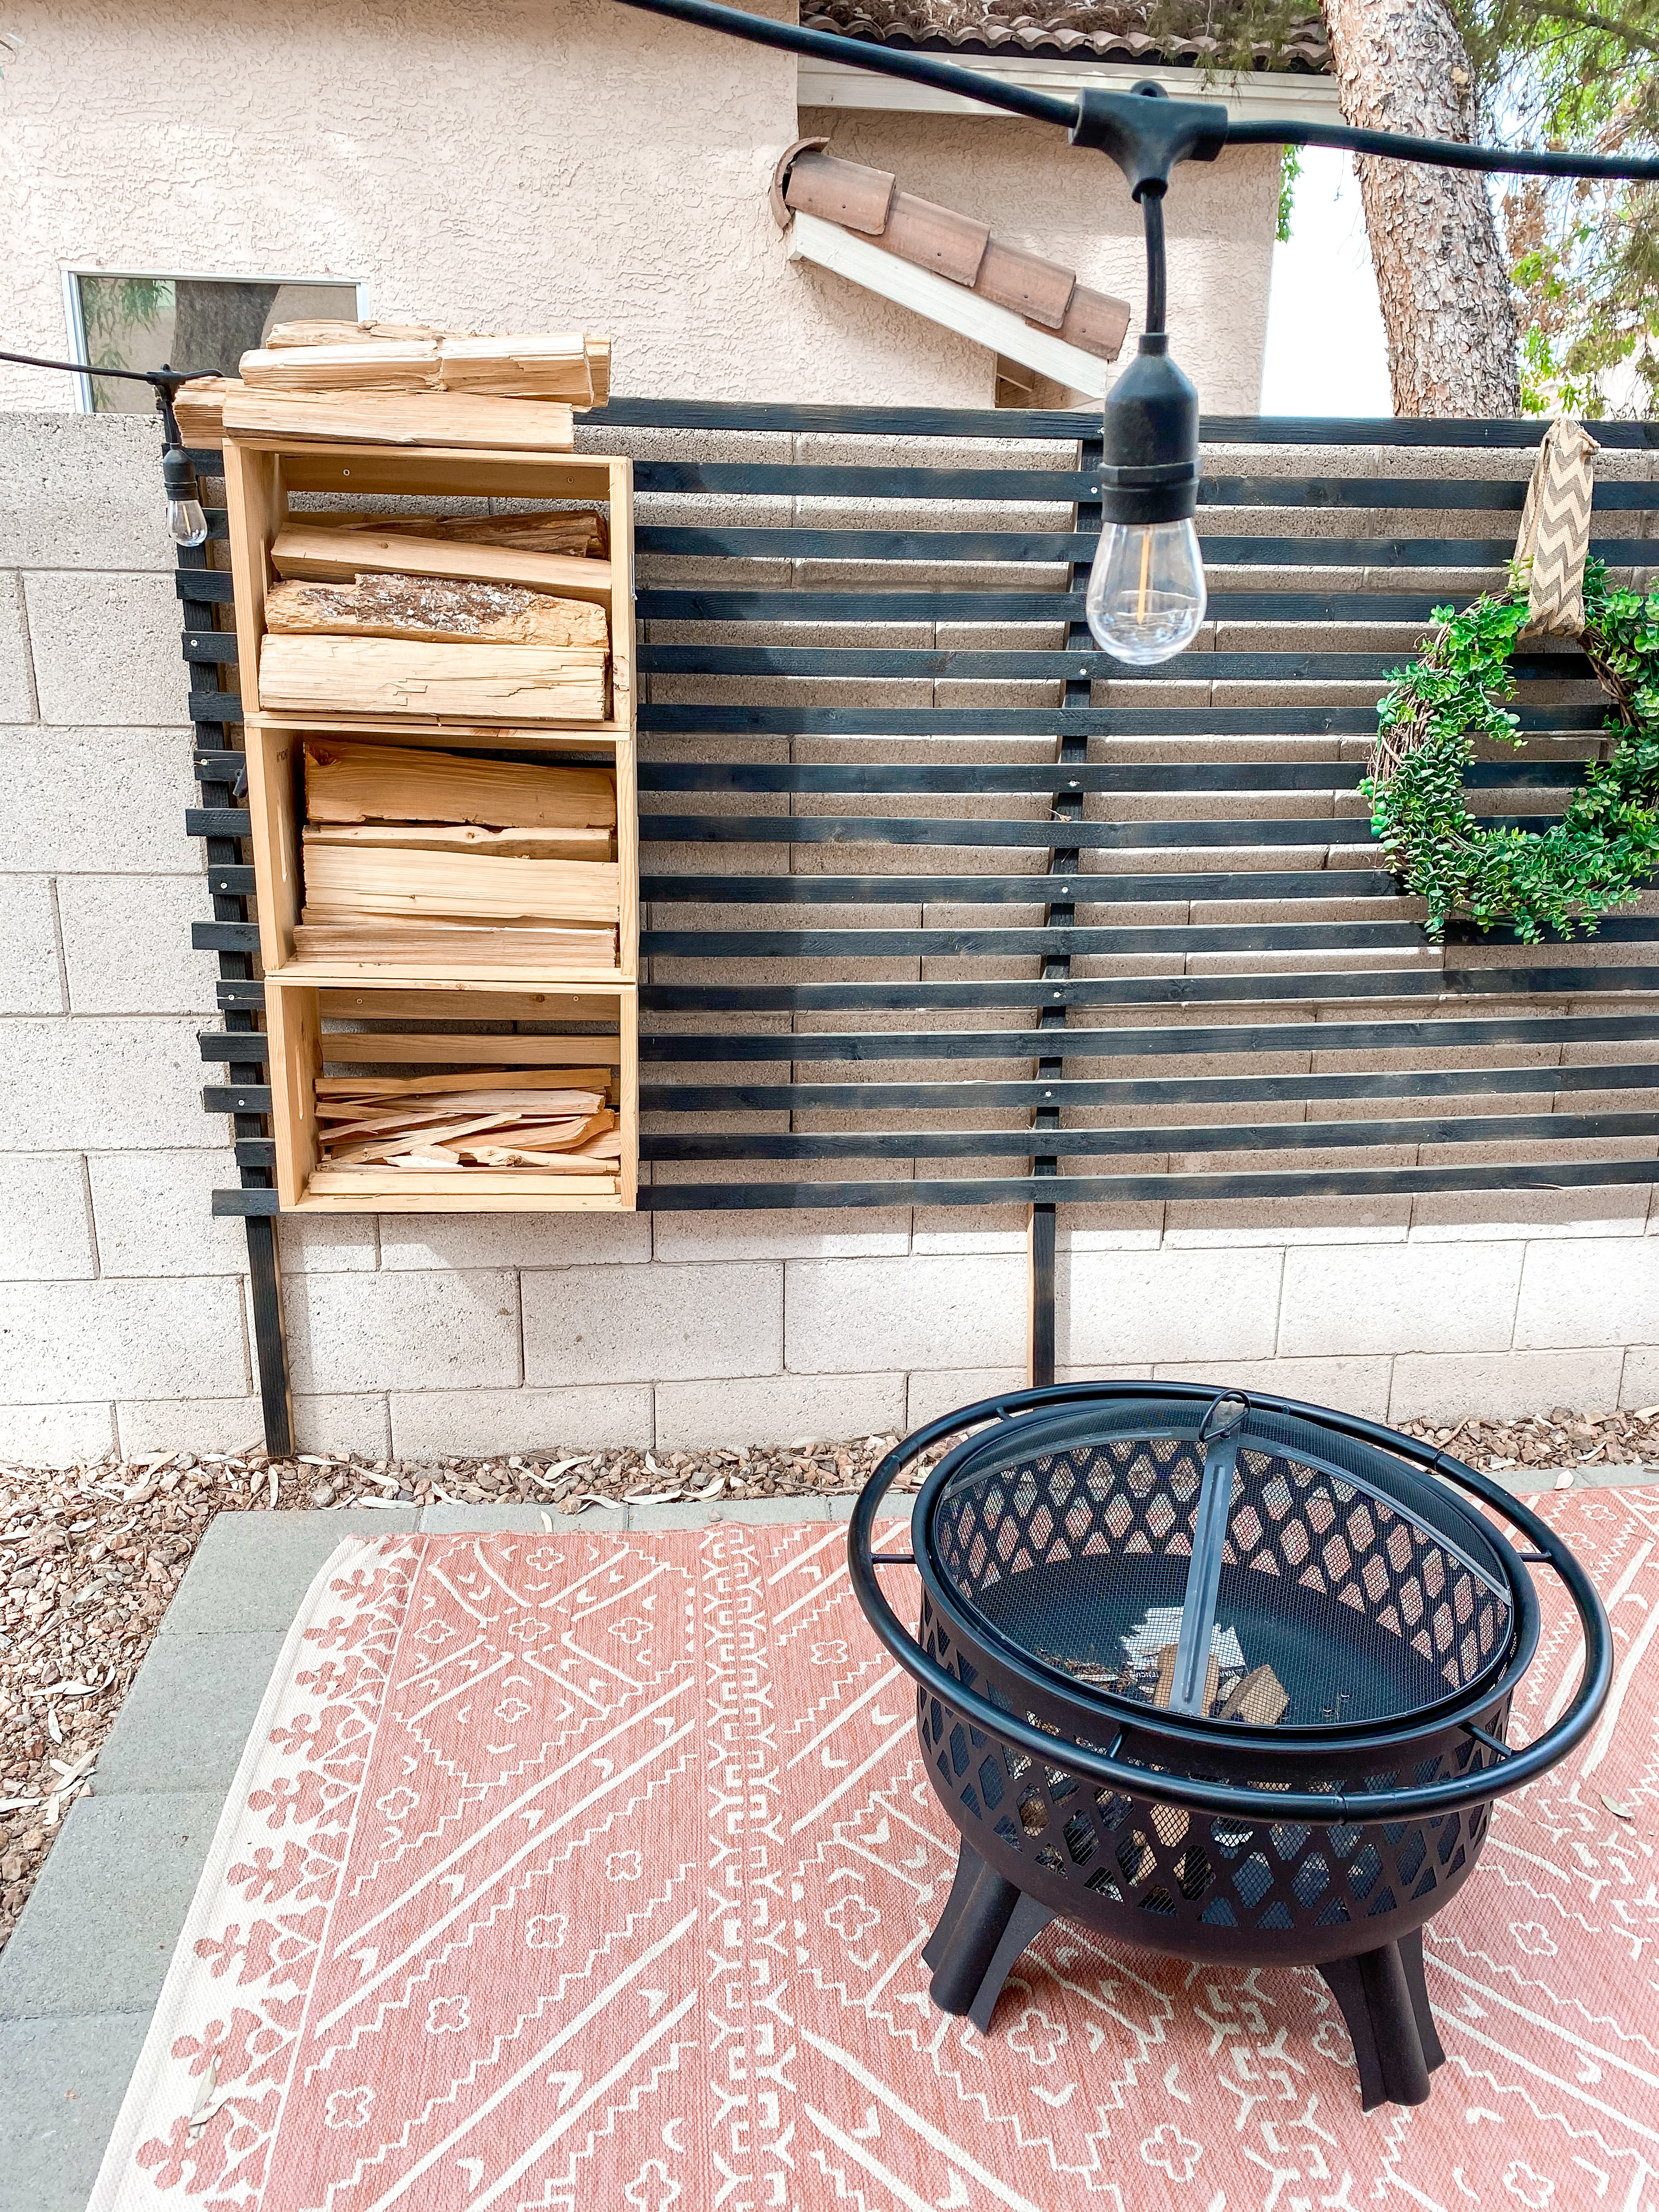
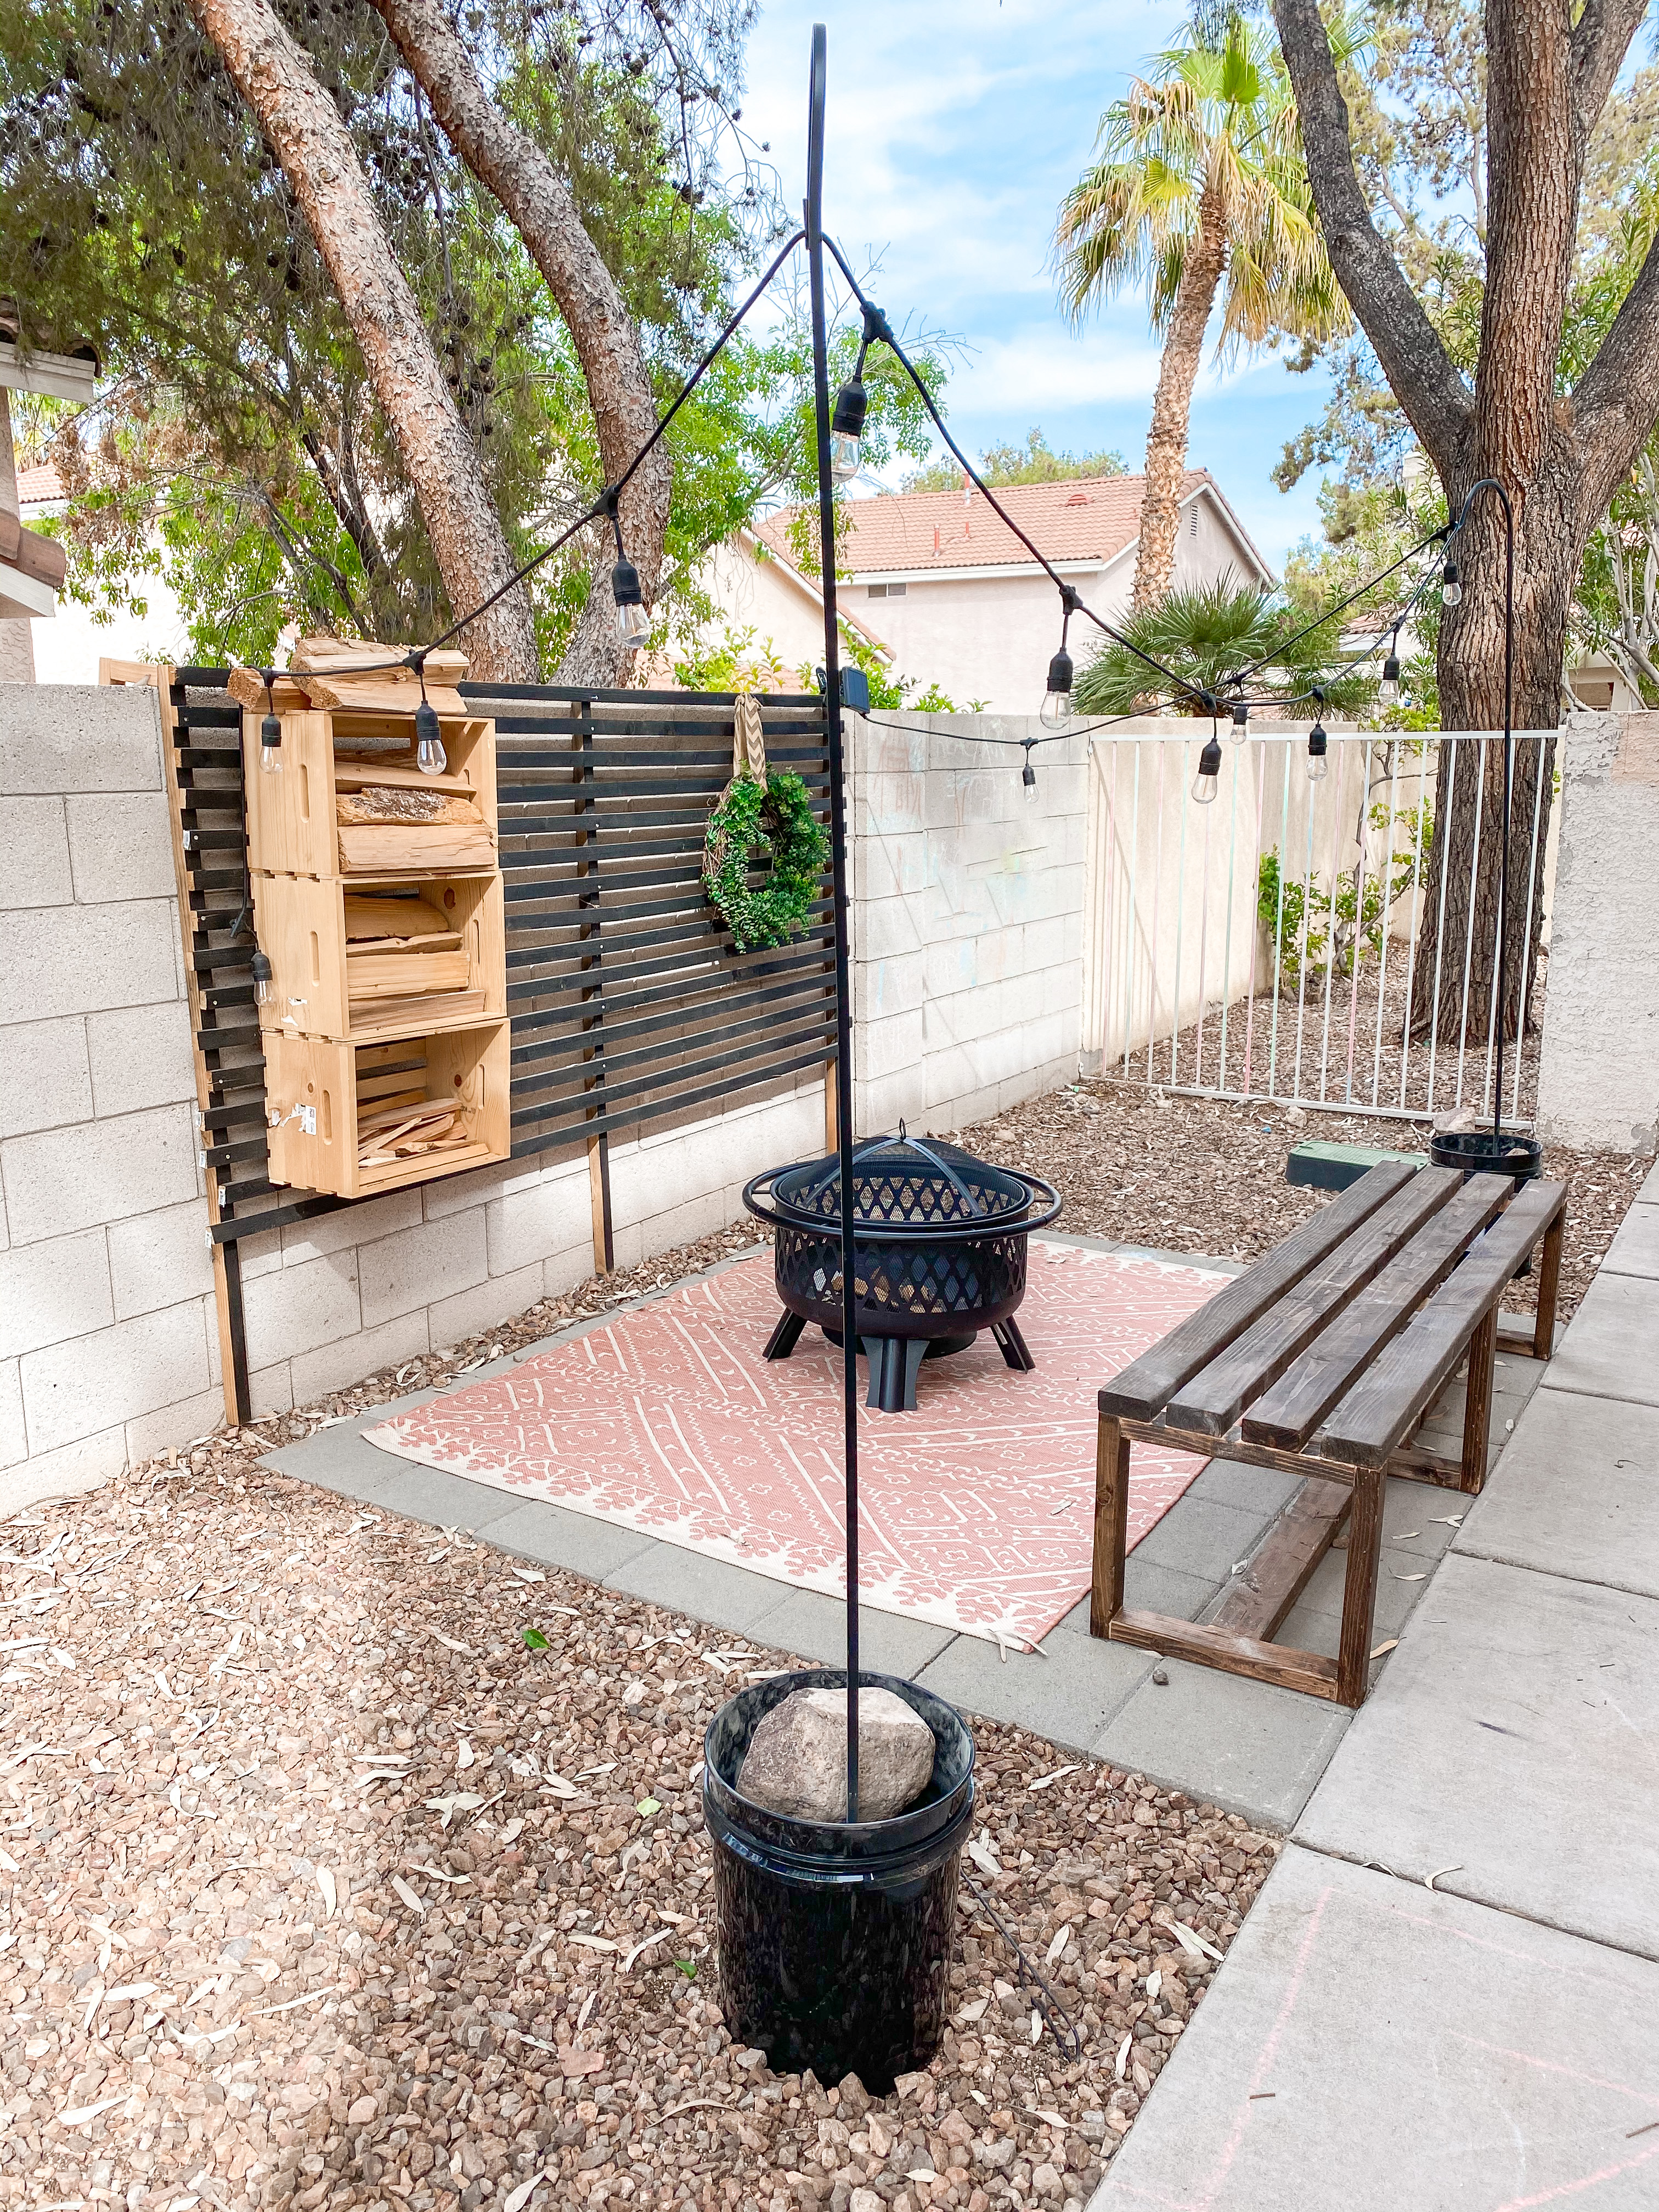
The Wall Trellis
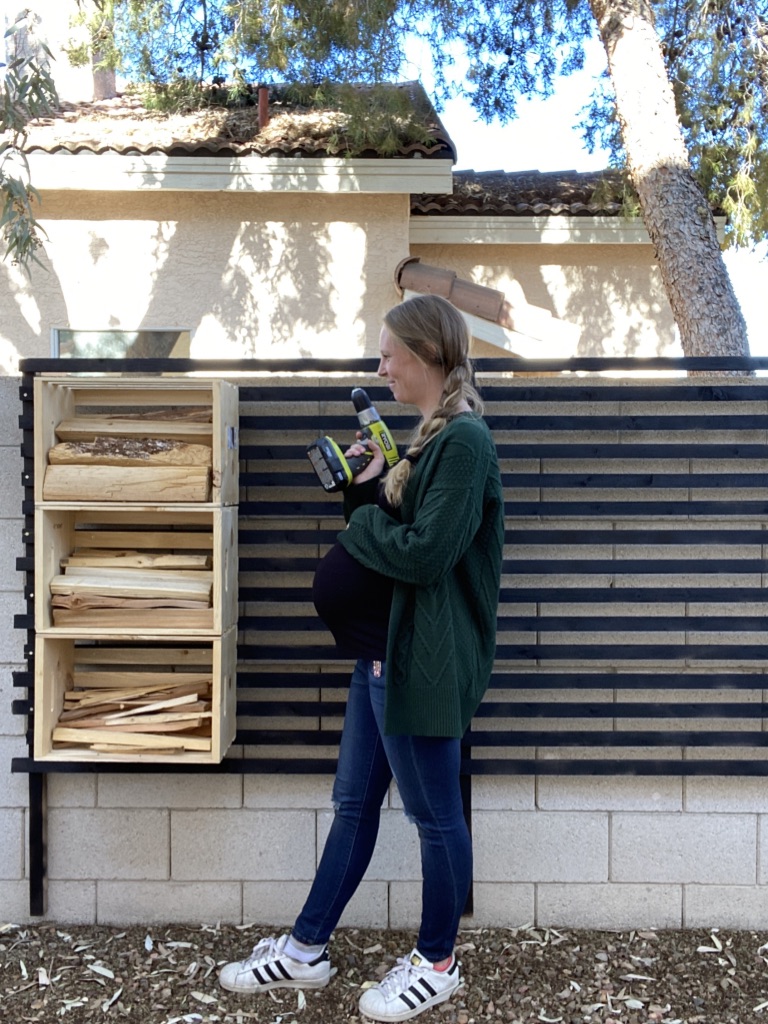
When I planned this area out in my head I envisioned a really cool wall trellis that doubled as firewood storage and a fun light feature. Being 36 weeks pregnant, I decided to keep the build simple!
What you need:
-1x2s for horizontal slats
-3, 2×2’s for vertical supports
–nail gun
-screws
–black spray paint
–deck stain guard for weather proofing
–wooden crates
To assemble the trellis, I laid the three 2x2s out on our driveway the length of the horizontal slats with one on each end and one in the middle. I laid the first horizontal slat at the top, then using another 1×2 as a spacer laid the subsequent horizontal slats. I used the nail gun to attach each horizontal slat to all three vertical slats. For every board I used a carpenter square to make sure everything was squared up.
When the horizontal slats were all secured, I used scrap 2×2 to make an L brace that would slip over our cinderblock wall so it wouldn’t be permanently attached. I then spray painted everything black and weather proofed it.
Originally, I toyed with the idea of building my own firewood storage cubbies, but I found that Home Depot sells these crates and I decided that would be much easier! I used screws to attach the crates to the horizontal slats, then reinforced the slats with screws for a stronger hold. After the crates were attached I weather proofed them. They are the perfect size for firewood storage and I like that our wood is organized and not on the ground!
Lighting
I really wanted lighting out here, but our side yard is not close to an outlet. I found these awesome solar powered outdoor string lights at Home Depot! They charge all day with a solar panel and stay lit for 3-4 hours at night. They are constructed well and I’m not worried about the bulbs breaking easily like other outside bistro lights I’ve purchased!
To hang the lights I needed tall poles that wouldn’t blow over in the crazy windstorms we get here. I bought two black 5 gallon buckets, a 50 lb bag of Quikrete, and these Shepherds hooks. I placed each of the hooks into a 5 gallon bucket and mixed the concrete directly in the bucket. It completely set in about an hour and is perfect for hanging string lights!

Seating
I toyed around with several ideas of what to do for seating, and eventually decided on a simple bench made from 2x4s! Here’s what you need:
-4, 2x4x8
-3, 2x3x8
–nail gun
–power drill
–3 inch outdoor screws
-wood stain and deck stain guard
- Make 6 cuts at 15 inches, and 6 cuts at 14 inches from the 2x3s.
- Make 4 cuts at 72 inches from the 2x4s.
- Assemble the legs for the bench. The 15 inch pieces are the top of the rectangle and the 14 inch pieces are the sides. Make 3 rectangles.
- Evenly space the 2x4s over the three legs and screw into place with outdoor screws.
- Stain with color of choice, then weather proof with deck stain.
Fire Pit
I found this gorgeous fire pit for a good price from Home Depot and knew it would look great in our side yard patio! It was easy to assemble and holds up well in the elements. It’s the perfect size for small groups to gather around and make s’mores!
Decor
To bring the space together, I added an outdoor rug and a wreath. I would love to add some planter boxes beneath the wall trellis in the future to bring in some greenery!
Would you consider adding this kind of patio to an unused area of your yard? I love how we took a space that was basically wasted and turned it into a stylish and functional side yard patio that we will use all year long! The best part is that everything is removable, so when we eventually move out of this house we can recreate this area in our next home! I hope you enjoyed this project, it was a long time in the works but it couldn’t have turned out more perfectly.
SKU Product List
Stepping stones: #100333077
Sand: #202092172
Tamper: #204476033
Wooden crates: #205533895
Deck stain guard: #305542042
String lights: #310461922
Quikrete concrete: #100318521
5 gallon buckets: #205952080
Shepherds hooks: #302643466
Fire pit: #302563838
For more DIY projects and home decor inspiration, check out related posts HERE!