 I love the house we’re renting SO much, but the second I walked into the kitchen I immediately cringed at the all of the honey oak cabinets! This house has been a rental for 15 years and obviously was never updated, but a part of me dies inside when I think of how amazing this kitchen would be with a little paint. Unfortunately, we aren’t allowed to paint so I thought I would suck it up and try to embrace the honey oak–in all of it’s glory.
About three months later I couldn’t take it anymore and started brainstorming ideas for lessening the orange-y look in our kitchen. After several weeks of searching “removable paint” and coming up empty, I had a crazy idea.
Contact paper.
I used contact paper to update our fireplace (see that post here) and since it’s removable and affordable I thought I could use it in the kitchen.
Our cabinet doors are framed and have lots of edges and grooves, so I knew covering them would be really difficult. Which is when I got an even crazier idea…
An entire open shelving style kitchen.
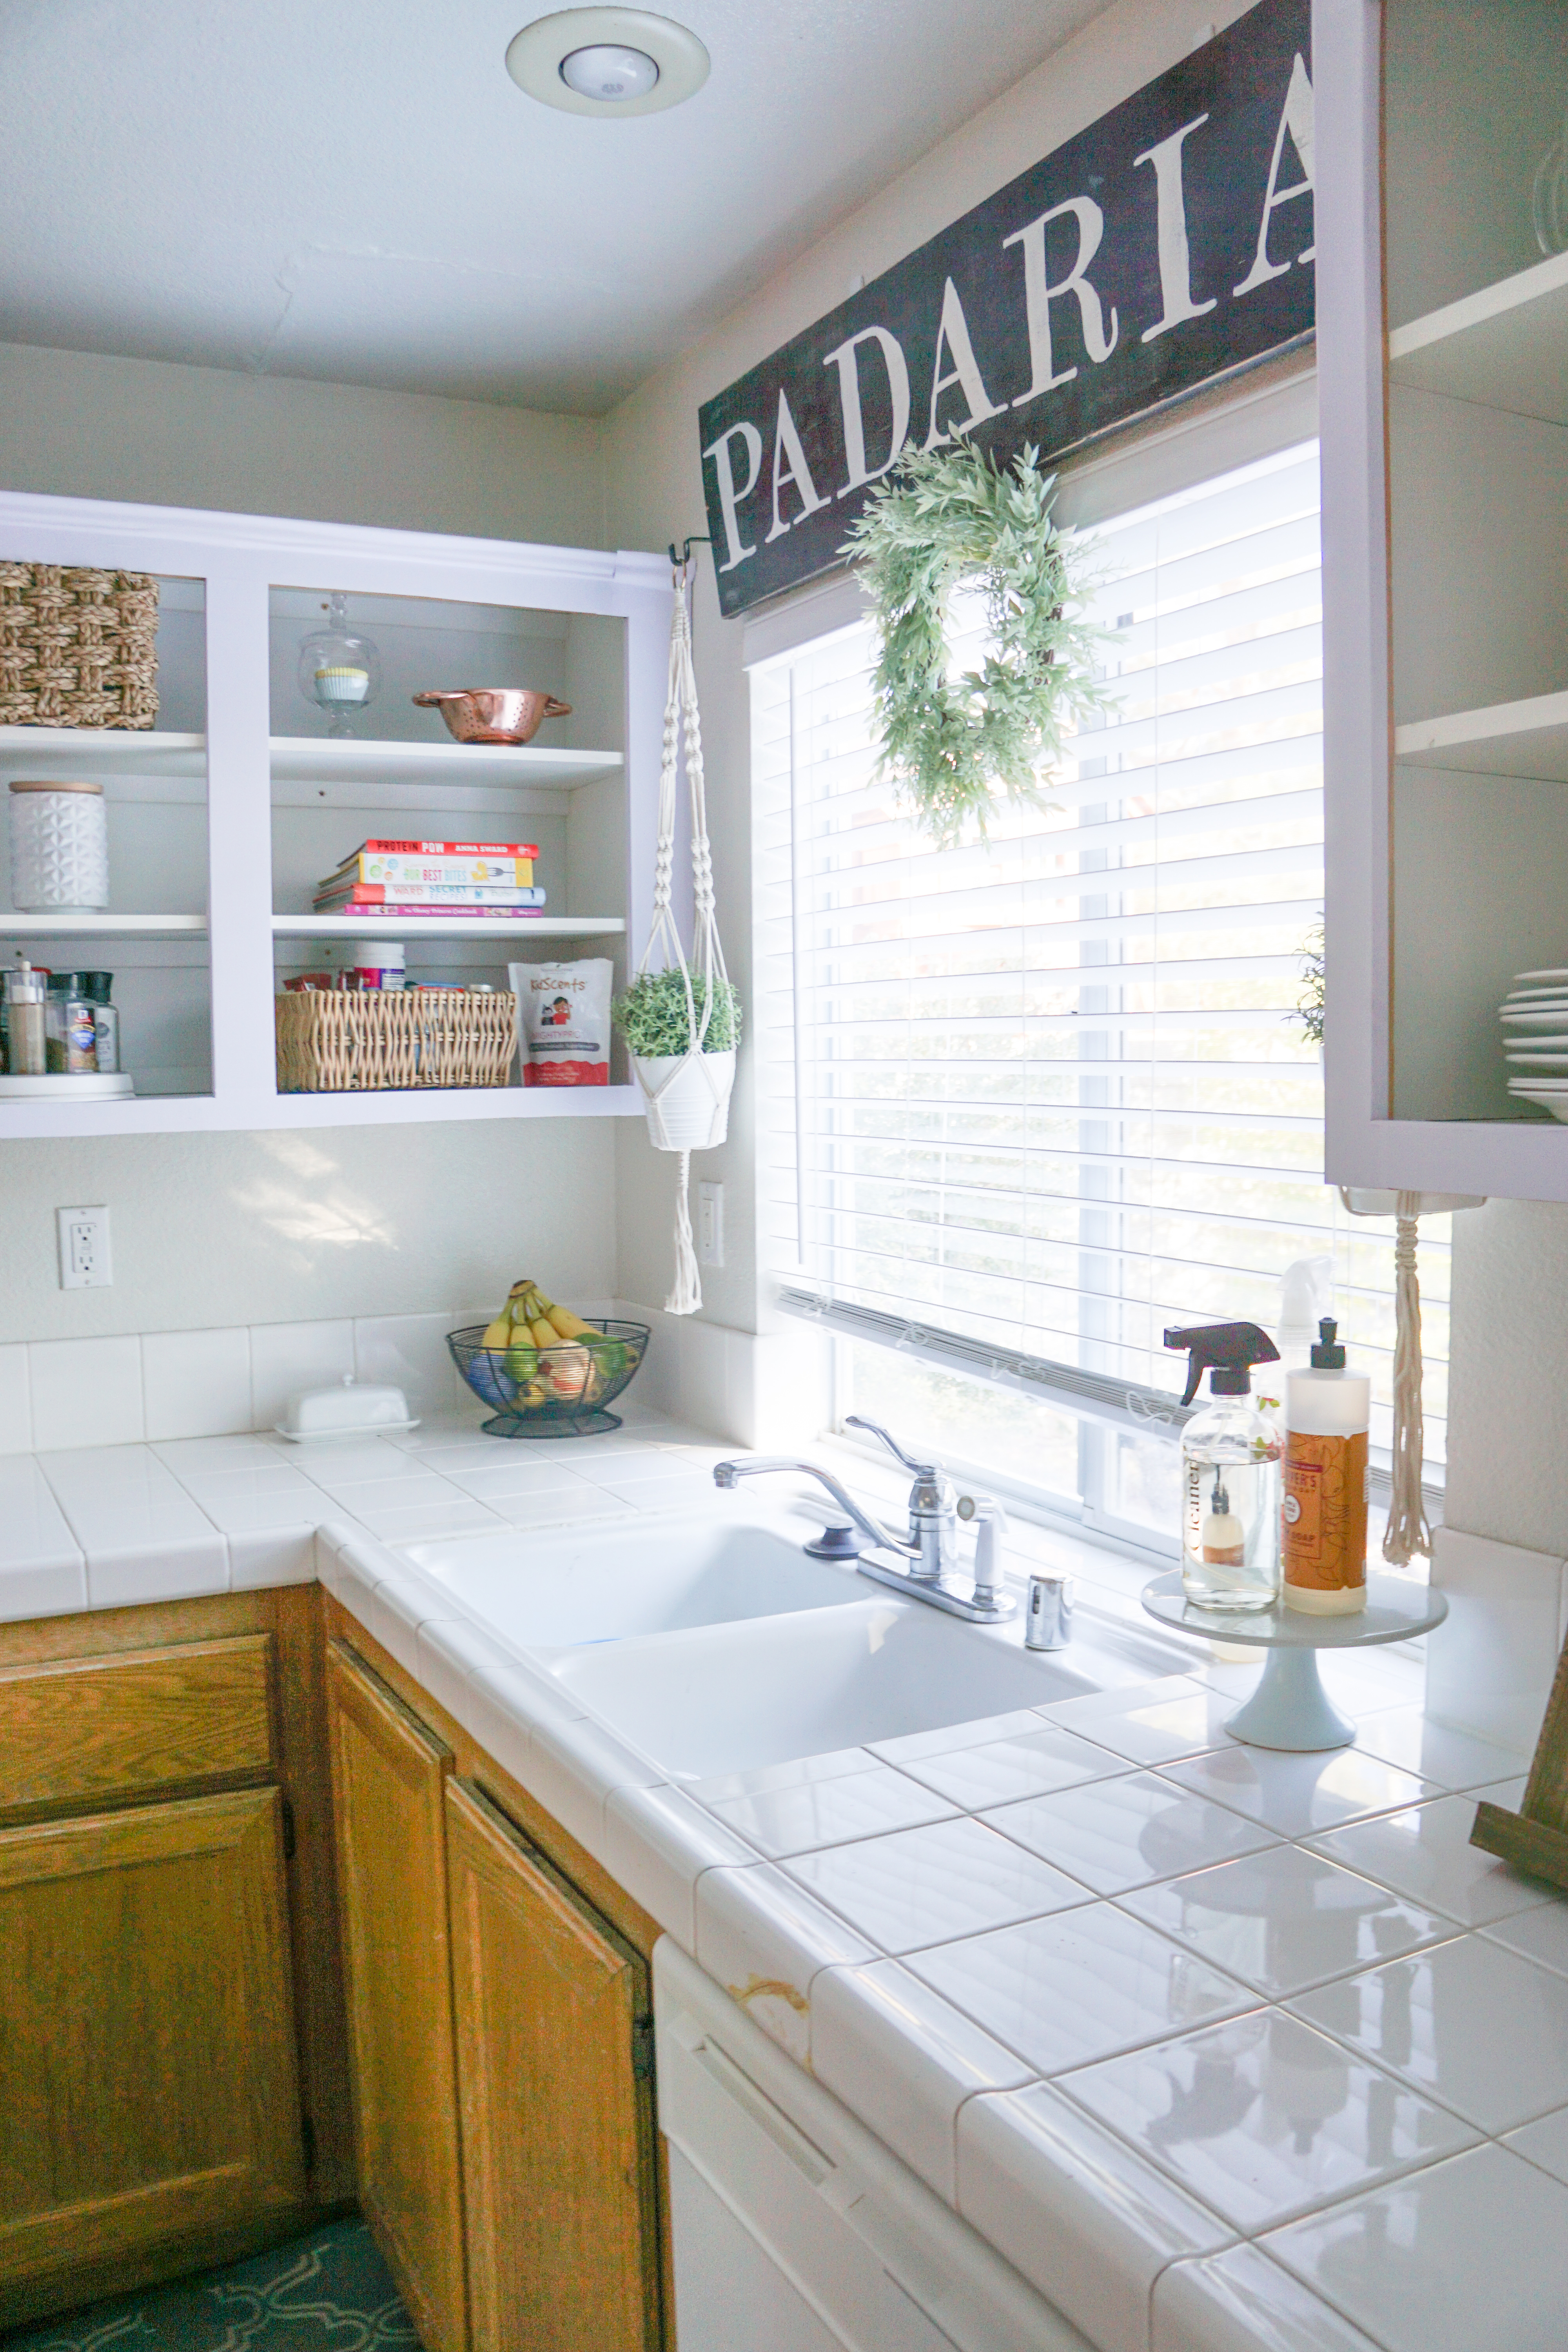
I am well aware that this style is not for everyone! My husband even thinks it’s pretty weird. But I LOVE it! Here’s how I accomplished this look and transformed our kitchen with only $10.
I bought this roll of contact paper off of Amazon for around $10. When it got here, I removed the doors off of one upper cabinet and started covering the frame in the paper. I measured everything exactly, and really tried to take my time to make sure it looked good since I normally want to rush through DIY projects. After covering the one frame, I left for a few weeks to see how I felt about it and to see if this was a feasible idea.
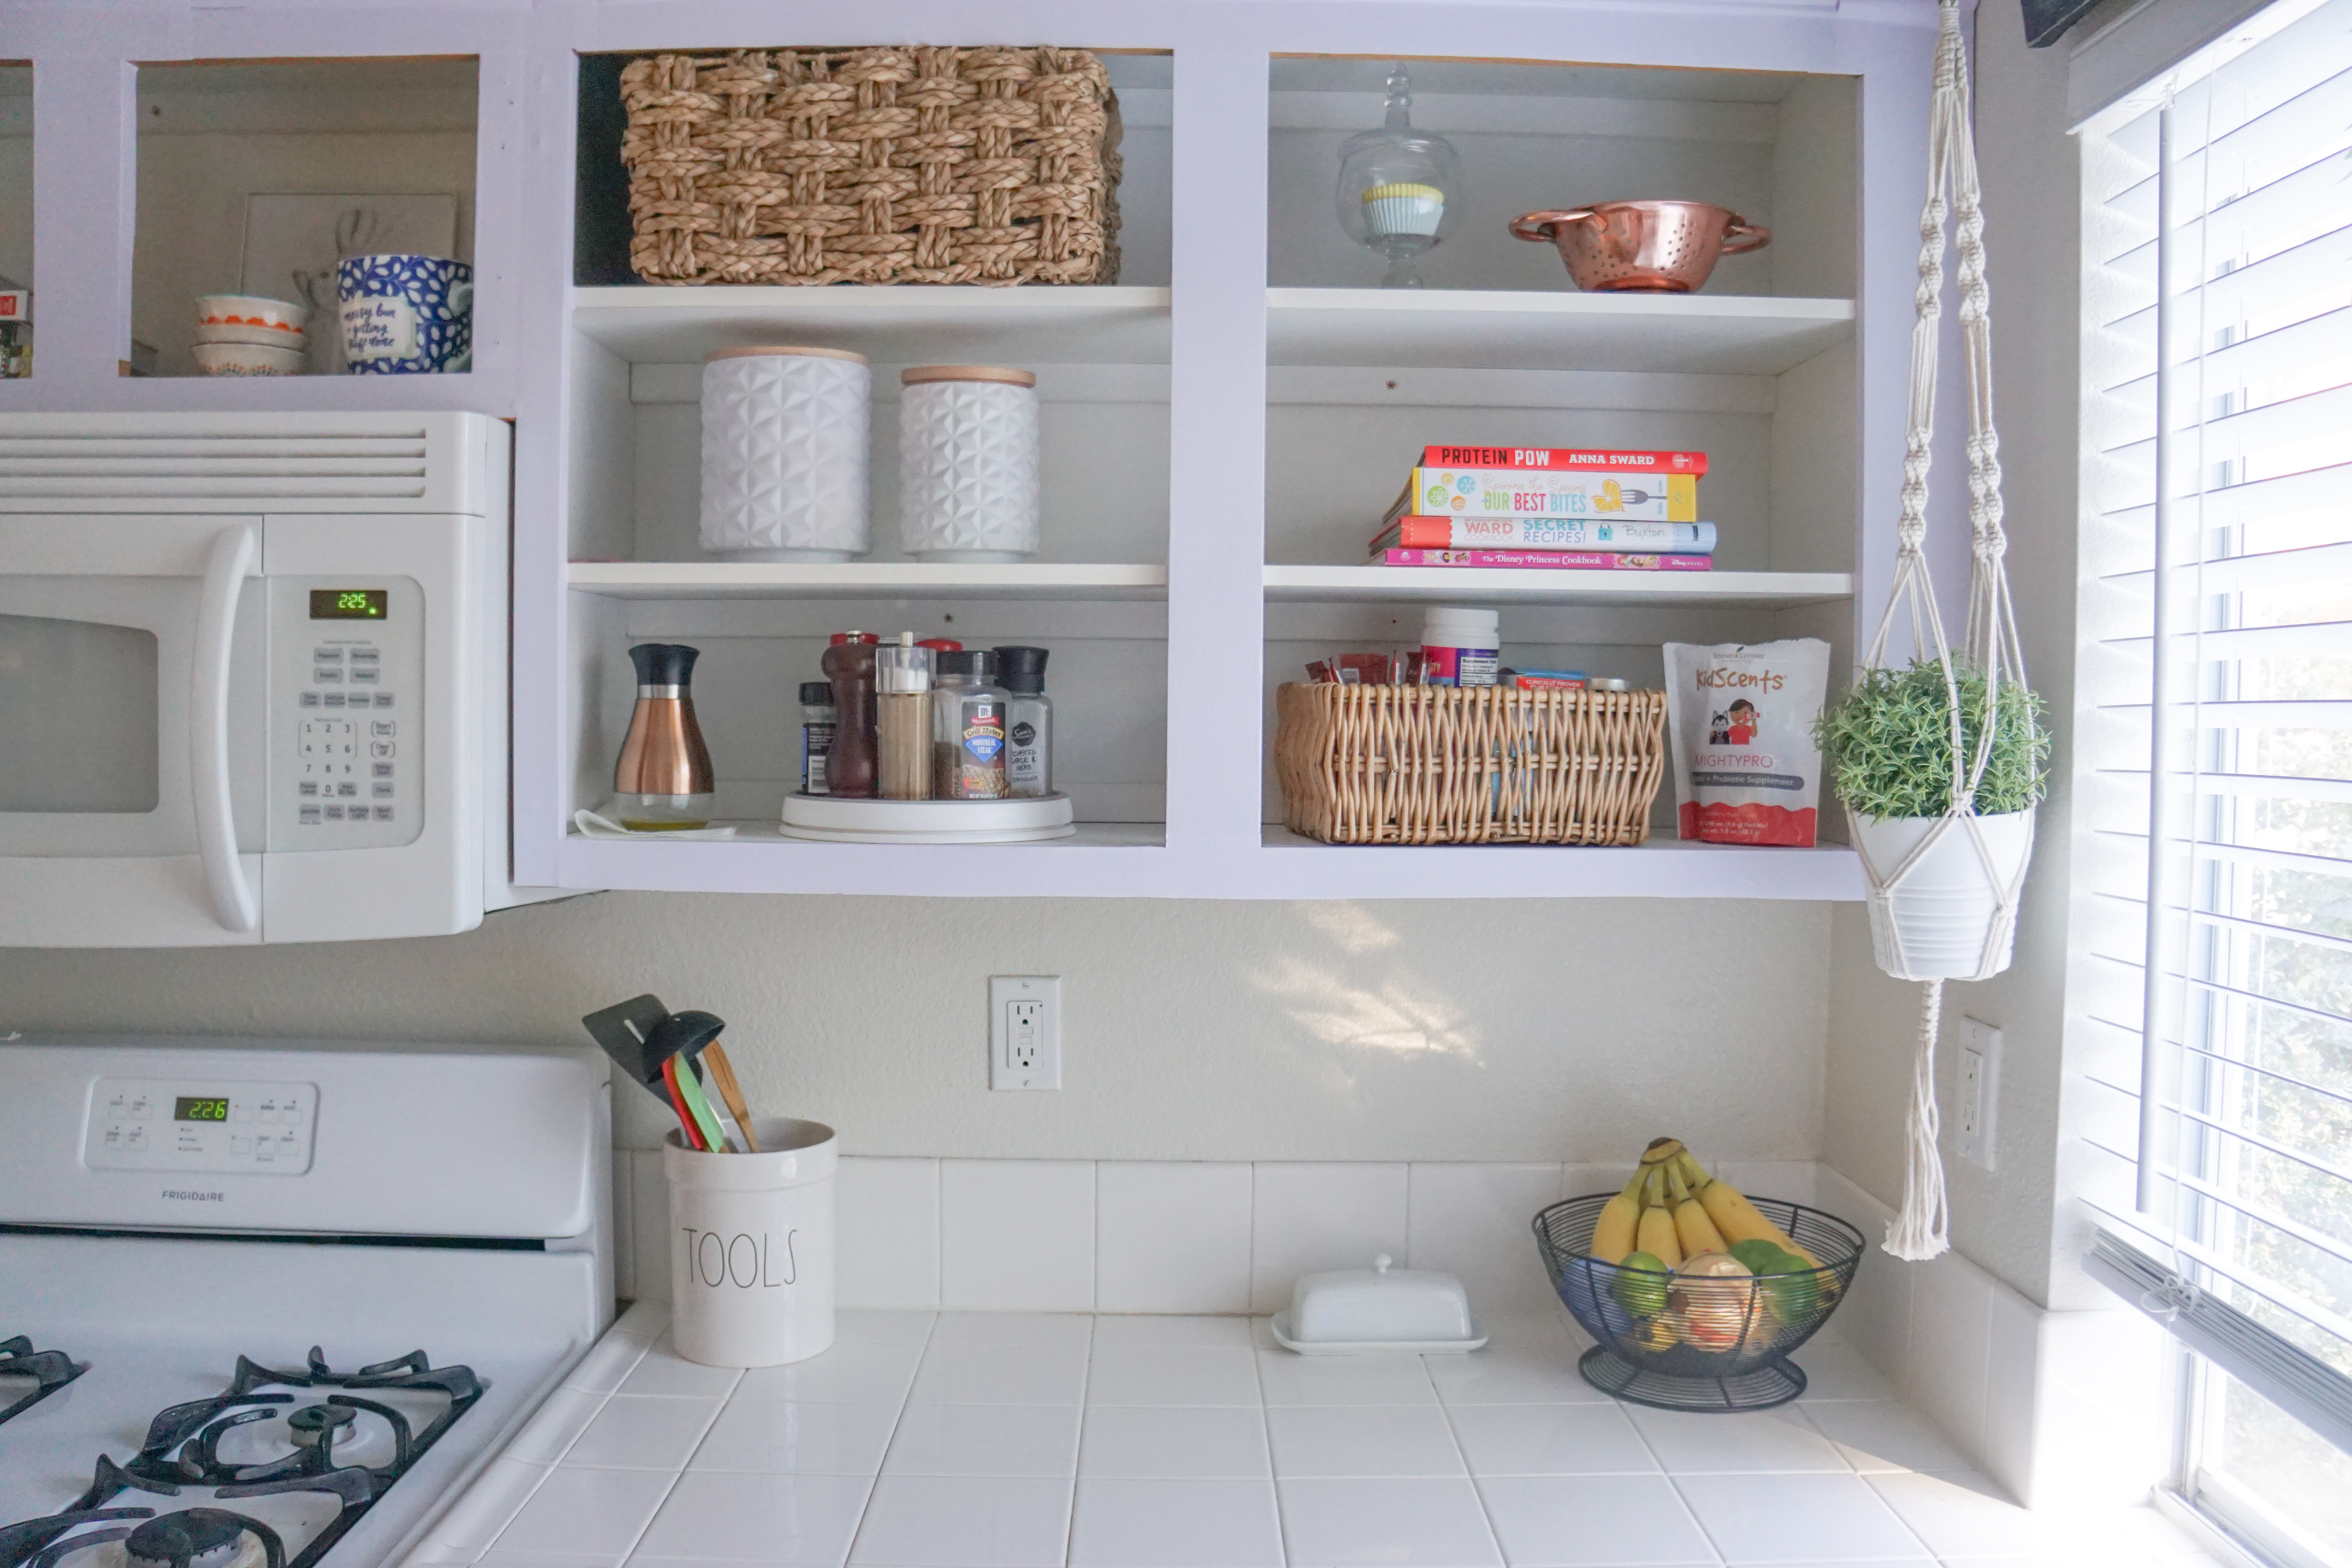
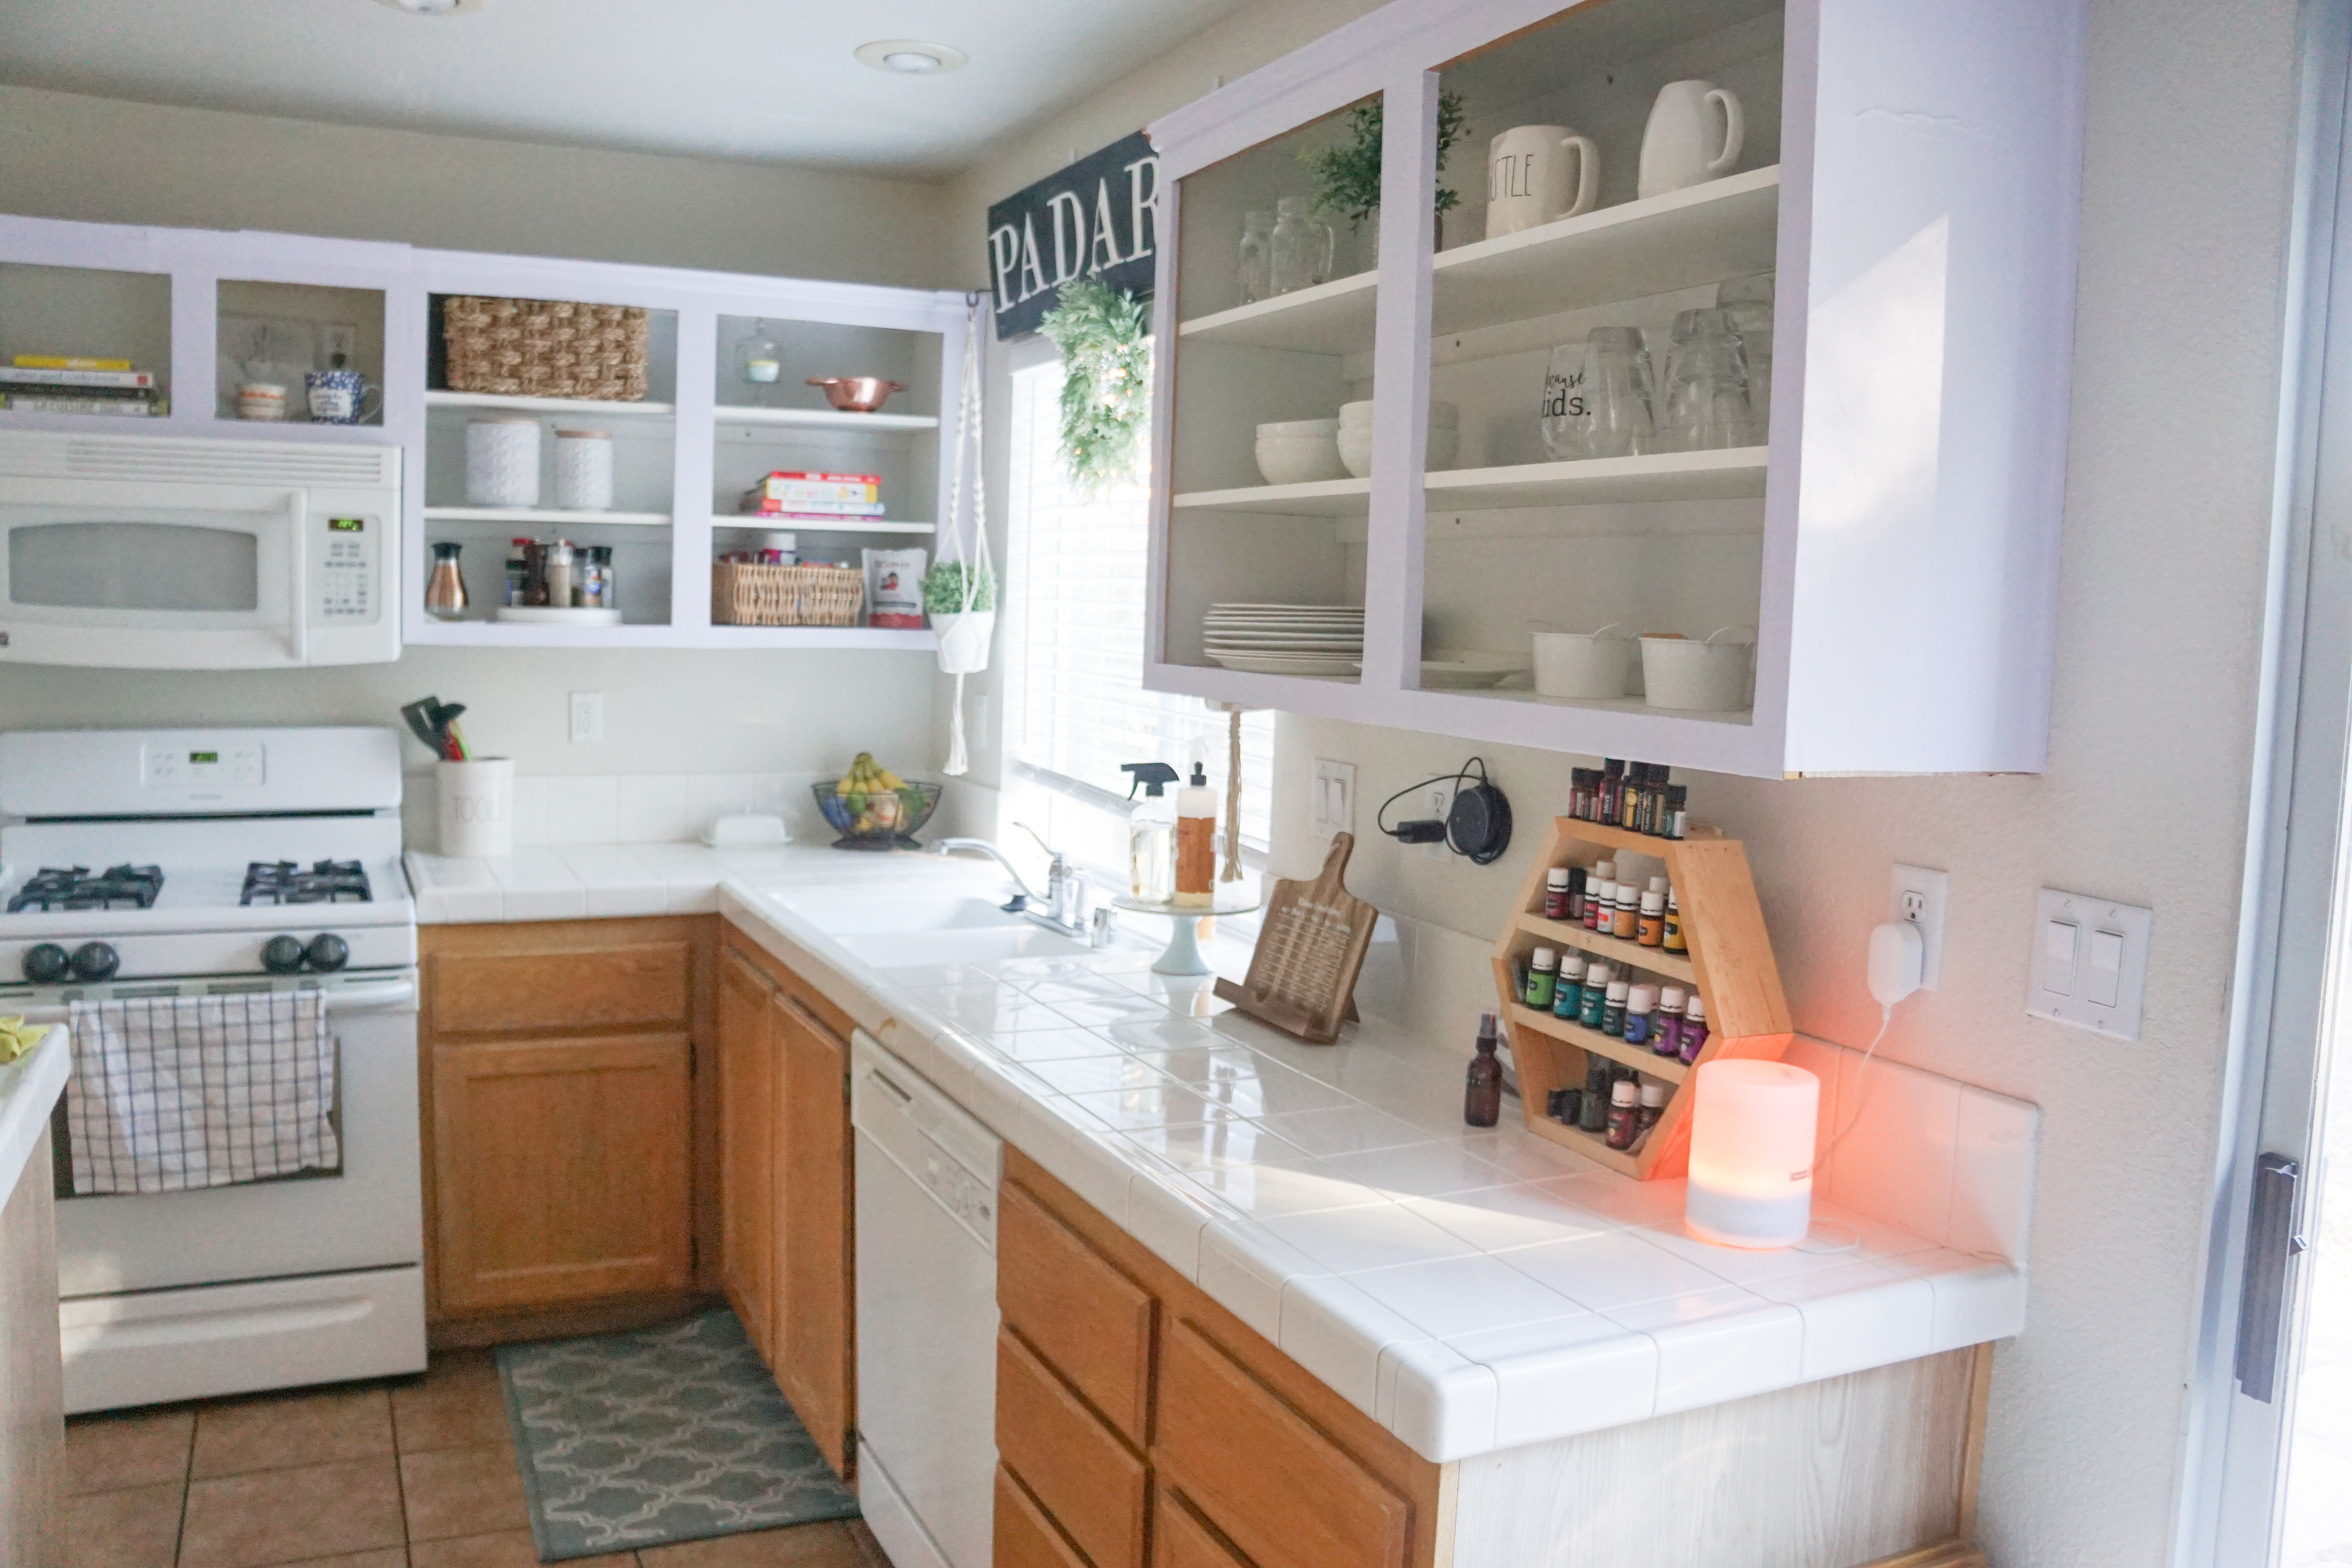
The nice thing about removing the cabinet doors is I was forced to style my shelves so they were both pretty and functional. I moved a lot of our dishes around, donated some that I didn’t love, and made sure everything complimented each other. After a few weeks of having one open shelving upper, I decided I loved the new design and wanted to revamp the rest of the cabinets.
I took all the doors off, covered the frames in contact paper, and started styling. The only things I bought were the wicker baskets that I got for about $3 each from Goodwill. I put all of our pretty dishes and cookbooks out where they’re visible, and hid things like vitamins, spices, and drink mixes in the baskets. I used little bowls and apothecary jars that I already had to finish off each shelf, and filled in the gaps with faux plants from Ikea.
I tried to get as much stuff off the countertops as possible, I even started storing our toaster in a cabinet to free up space! I love how clean and free our counters are, and it makes having a clean kitchen feel so much better when there’s less clutter.
When people come over, they always say they couldn’t have their kitchen look like this because they store all of their stuff behind cabinet doors. Let me tell you how much I LOVE seeing everything that’s in my cabinets! It forces me to keep things organized and neat, and I love knowing where everything is without having to search through cabinets. It’s really fun rearranging the shelves and adding little touches for the holidays, and I can confidently say I am so glad I decided to do this!
I know this isn’t for everyone, and a lot of you won’t like this! But if you’re stuck in a rental house with a crappy kitchen there are options to spruce things up. Make a wish list, get creative, and buy some contact paper!